
🧰 Project 5A: IR Sensor!
This Project is an Example of…
MOTION DETECTORS
Technologies like security cameras, lights, and camera traps use infrared (IR) sensors to react to movement.In this project, you will learn about a versatile, exciting sensor that can detect the presence of an object up to a certain distance in front of the sensor. This is a simple project in terms of both the code and the wiring to complete it.
But even though it only requires a few wires and one sensor, the sensor in this project is a very powerful tool for helping your Arduino interact with things in its immediate environment. In a way, you are teaching your Arduino to “see” the world around it.
What you will learn:
We will wire up and experiment with an infrared sensor that can “see” an object from a short to a medium distance in front of it. When it detects an object, it lights up the onboard LED of your Arduino.
We are also using the Serial Monitor in this project, like we did in some previous projects. When the sensor detects an object, it will tell you that it has a “hit” on the Serial Monitor; otherwise, it says that it detects a “miss.”
The sensor for this project is designed to detect whether an object is (or is not) present in front of the sensor. Because of that, this sensor is widely used for obstacle avoidance.
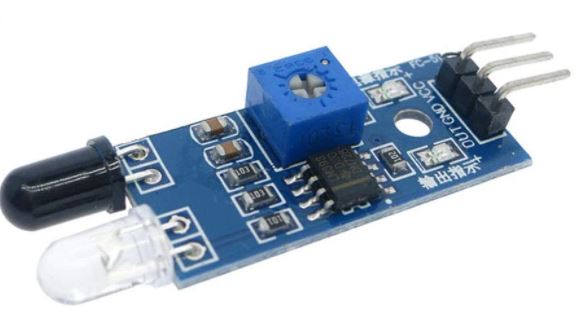
You will be using an infrared (IR) sensor, but there are several different types of IR sensors, so let’s talk about how this one works.
Looking at the sensor, you will see two “bulbs” soldered to the front end of the sensor. These “bulbs” are actually a transmitter and a receiver.
The clear “bulb” is the emitter which sends the IR signal out; the dark “bulb” is the receiver which listens for a signal to come back.
When an object within the range of the sensor is hit by the emitted signal, the object reflects that signal back towards the sensor and the receiver detects this. The sensor knows that something is in front of it and sends a digital signal back through the “Out” pin to the Arduino.
Because this IR sensor shoots out a signal and waits for a response (the reflected signal), it is known as an “active” IR sensor. Other types of IR sensors just look for heat emitted by some object in the environment around them; these don’t emit their own signals, and are called “passive” IR sensors.
You can adjust the range of your sensor by turning the potentiometer in the little blue box on the sensor body. The range for this sensor is between 2 and 30 centimeters (cm), or between approximately 3/4 inch and 12 inches.
Required Components


Add Sketch to Editor
Download the Sketch
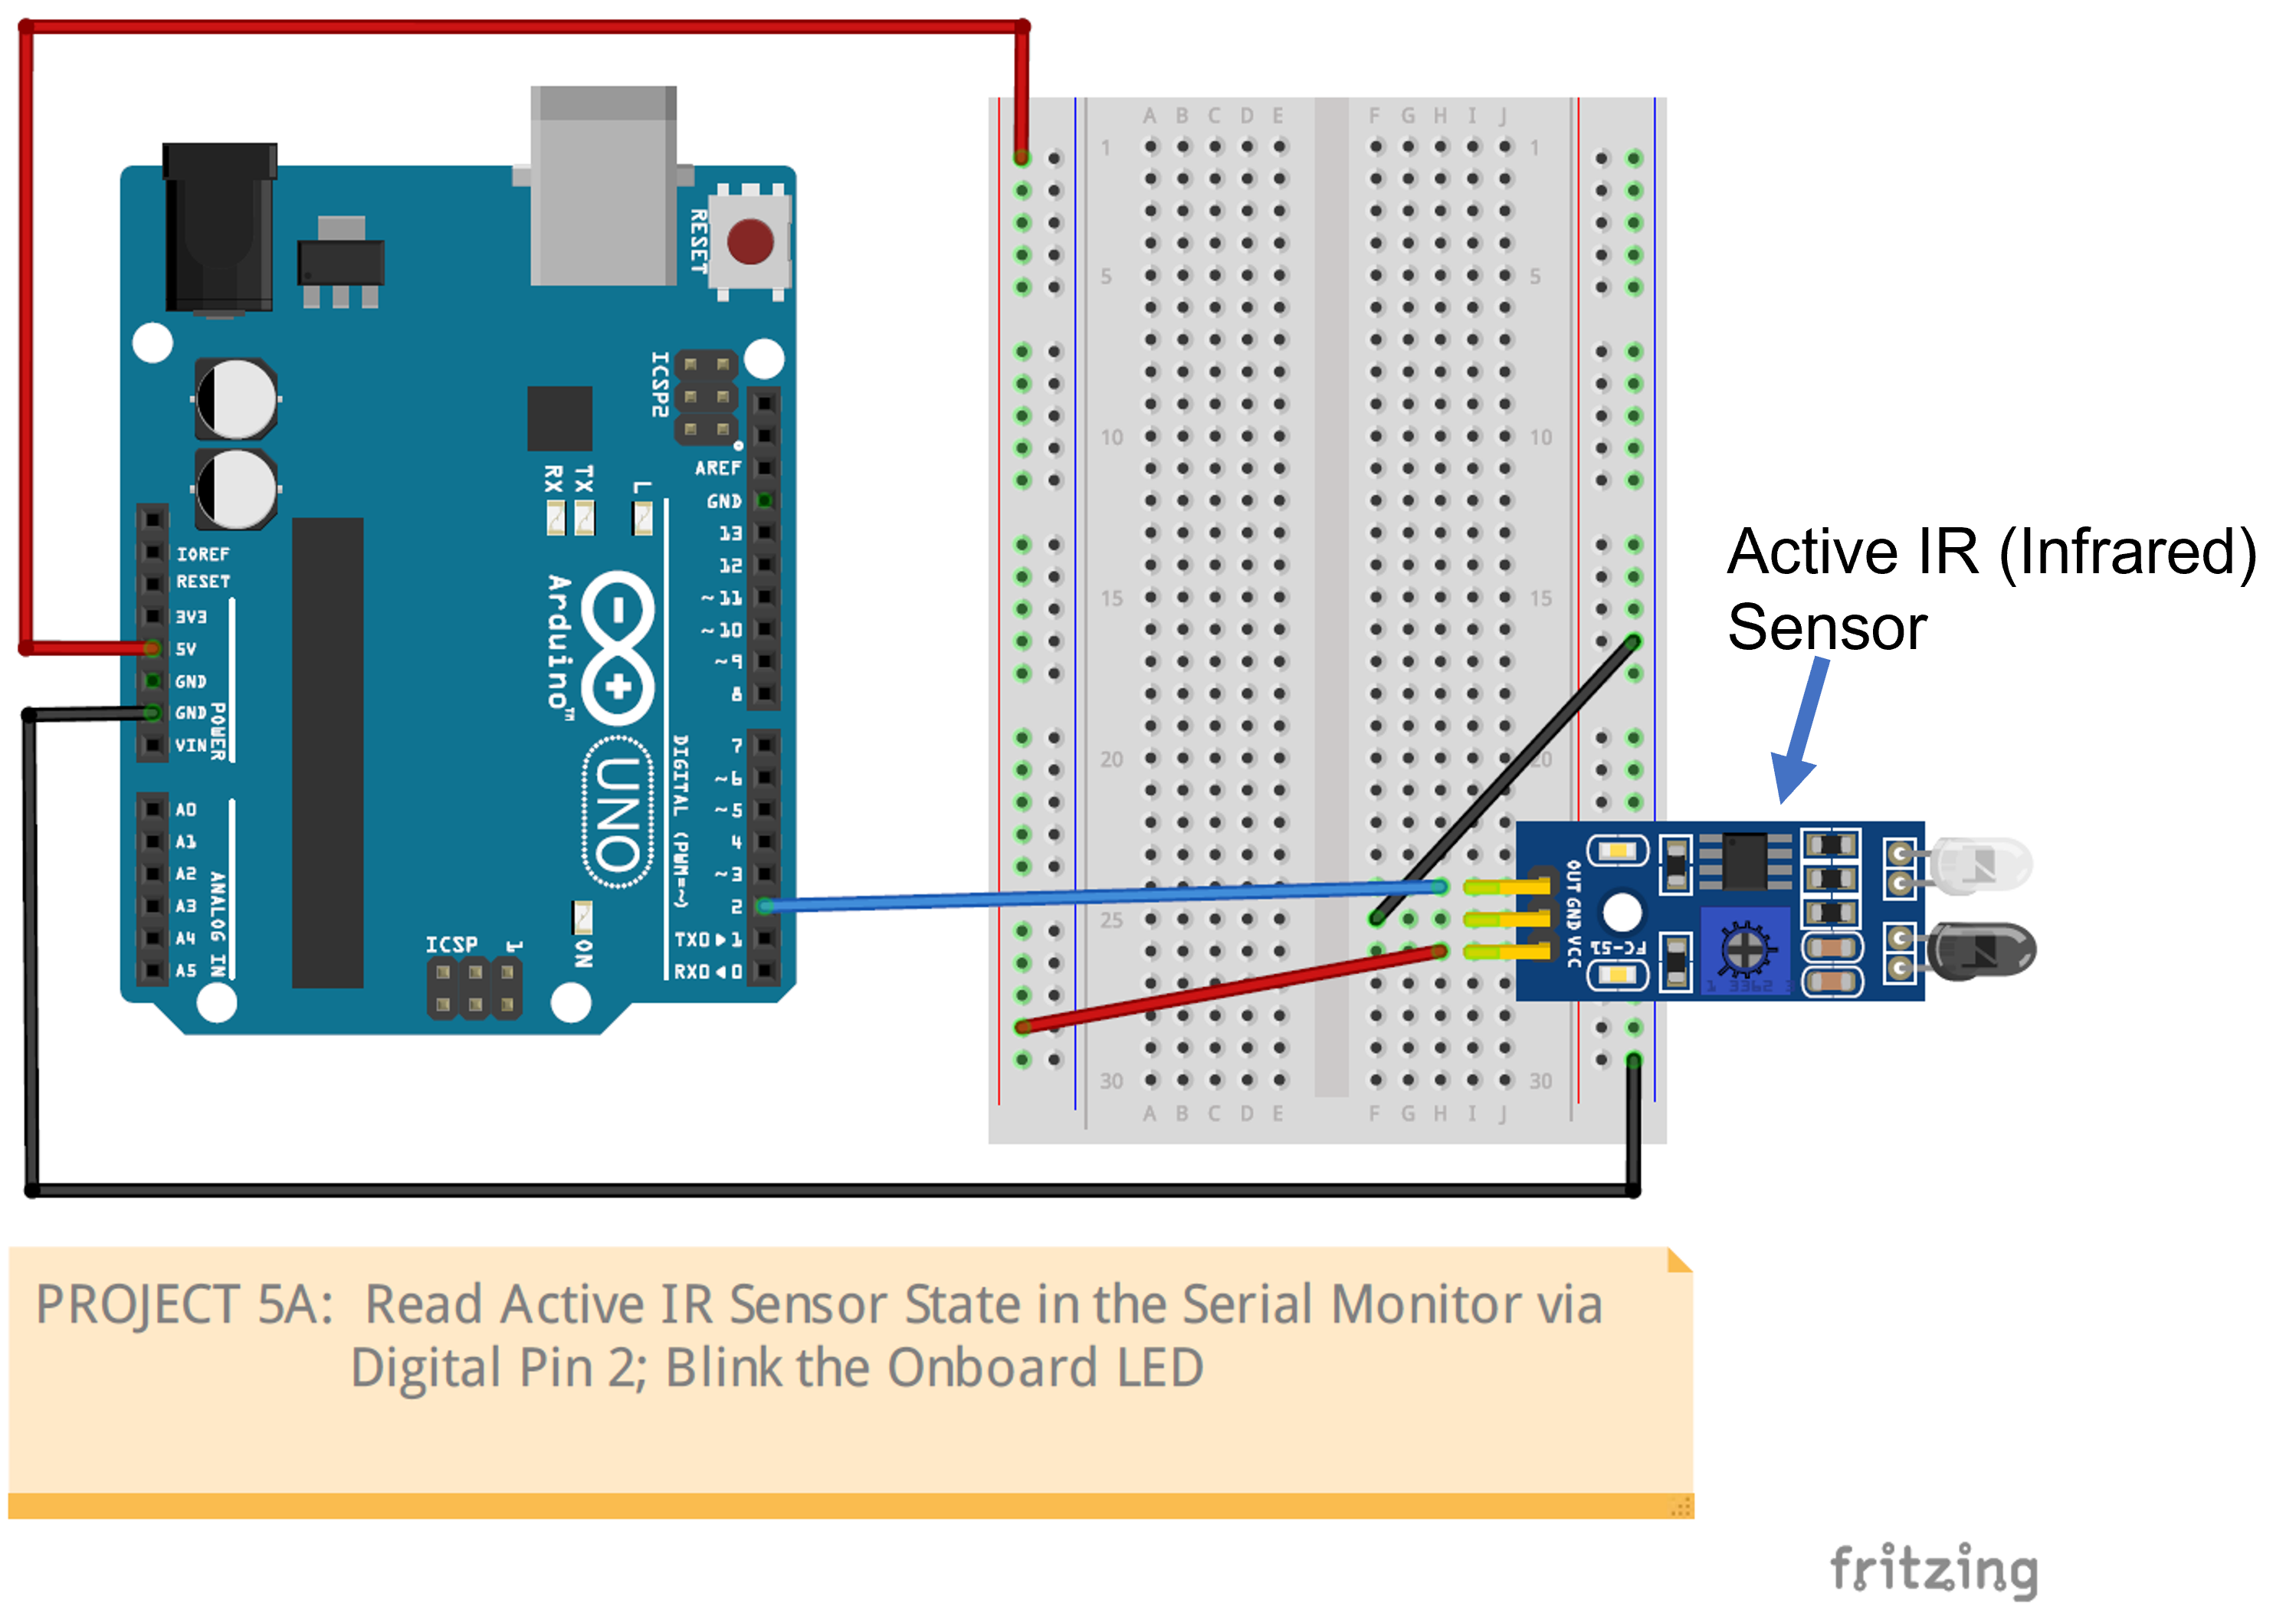
Fritzing Diagram
When you have wired up your project, it’s time to find out how good your Arduino’s vision is!
- Before starting, open up the Serial Monitor in the Arduino IDE so you can watch the sensor’s responses as you run the program.
- When everything is ready, run your program and place your hand a good distance away from the sensor–about 2 feet–directly in a line straight out from the two bulbs.
- The onboard LED on your Arduino should NOT be lit up yet. The Serial Monitor should say “The IR Sensor detects a MISS.”
- Slowly bring your hand down towards the IR sensor until the LED on your Arduino lights up and the Serial Monitor says “The IR Sensor detects a HIT.” Your Arduino has “seen” your hand!
- Note the distance from your hand to the bulbs; it should be somewhere between very close (less than one inch) and pretty far (one foot).
- Experiment with this distance to see if it is consistent by repeating this experiment.
Building Tips
- Wire this project according to the Fritzing diagram for Project 5A.
- Double-check your connections before powering up.
- UPLOAD AND SAVE the correct/current sketch to your Arduino from the Web Editor.
Expand Your Learning
- Try using a light-color or white sheet of paper instead of your hand to set off the sensor. Is the distance the same as with your hand? If it’s different, is it more or less than your hand?
- Try using a dark-color sheet of paper. How is that different from your hand, and from the light-color paper? Which one is the sensor most sensitive to? Least sensitive?
- Why do you think the color of the object makes a difference?
- Think of three different ways you could use this sensor in different projects.
- Think of different ways to use this sensor in a real-life setting, like a factory or workplace.
- Can you think of any devices you use every day that might have a sensor like this in them?