
🧰 Project 2A: Blinking LED on Breadboard!
This Project is an Example of…
EMERGENCY INDICATORS
Hard to ignore a blinking light, right? Construction zones, first-responder vehicles, and emergency exits use blinking lights to draw people’s attention to them.In this project we are going to build the the 'Hello World' blinking light project again, but this time with an LED on a breadboard.
Required Components


Add Sketch to Editor
Download the Sketch
Fritzing Diagram
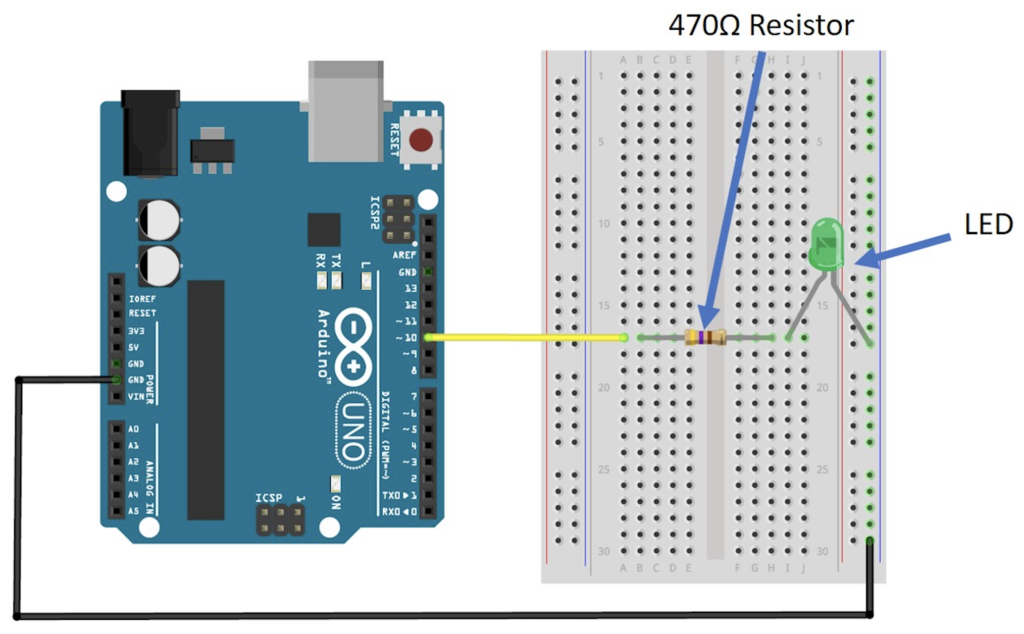
Now that you've wired up a few projects, try to build this one just by looking at the diagram above.
Building Tips
- Wire this project according to the Fritzing diagram for Project 2A.
- IMPORTANT: Make sure to plug the long leg of the LED next to the resistor, and the short leg of the LED into the ground power column that the black jumper wire is connected to.
- Make sure to use Digital Pin 10 for the color jumper wire to the LED.
- Double-check your connections before powering up.
- UPLOAD AND SAVE the correct/current sketch to your Arduino from the Web Editor.
Expand Your Learning
- Change the blink rate of the LED by trying different numbers for the variables onTime and offTime in the program, Lines 20 and 21.
- What happens to the blink rate when the numbers get higher? Lower?
- What happens if the numbers are not the same?