
🧰 Project 4A: Buzzer!
This Project is an Example of…
SPEAKERS
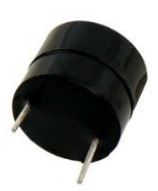
Speakers are used from everything from alert systems, music broadcasts, cell phones, alarm clocks…and more! What piece of equipment could benefit from having a speaker?For this project series, we introduce a cool new component called a "piezo-electric passive buzzer," which is a complicated name for a very small speaker that you can control with your Arduino.
This first project is easy to build--just the speaker and two wires to connect it to your Arduino. In fact, this same build will work for projects 4B, 4C, and 4D.
The program that you flash to your Arduino is the only difference between these projects. These four programs all demonstrate different things you can do with sound on an Arduino, and how to control the speaker.
This first project is a simple 7-note melody that you will recognize right away.
Required Components


Add Sketch to Editor
Download the Sketch
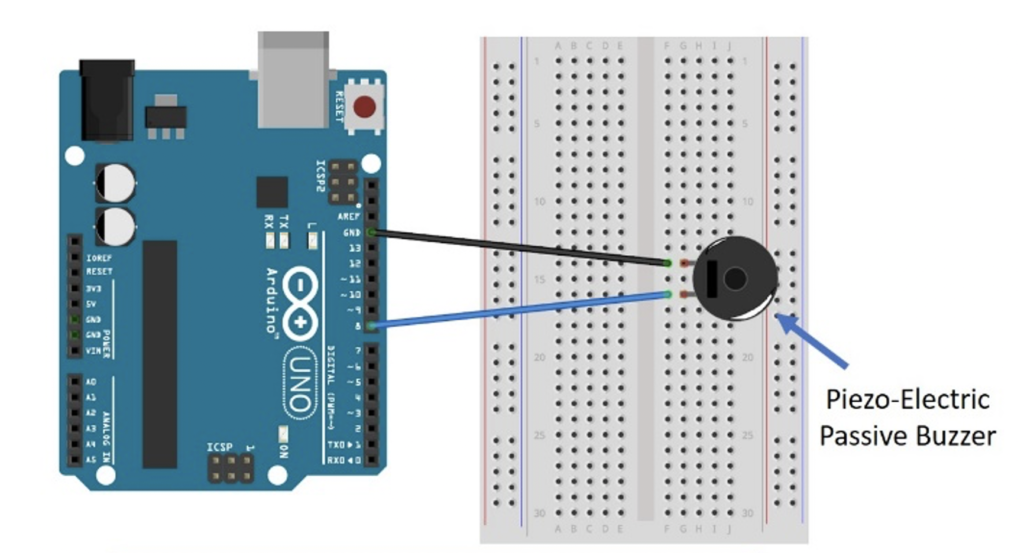
Fritzing Diagram
What you will learn:
- You will see how to connect a speaker to an Arduino. Because it's easy, it makes it great addition to many other projects that could benefit from adding sound.
- By examining the code in this program, you'll get start to understand how sound is generated with an Arduino.
- This is the first time we have used a library in any program we have run. A library adds functionality that could be used in many different programs, so the creator of the library will write it one time and make it available to anyone who wants to use it. Then a user can "check the code out" (like a library) and use it without having to write it from scratch.
The library in our program is called into action on Line 23 of the program: #include "pitches.h"
If you click on the tab for this project called pitches.h, you will see the code for the library. It defines all the notes that you would find on a piano (and a few extra ones). That way, when you want to play a melody, you just "check out" the notes you want from the library called "pitches.h," and you're ready to go!
Here's a sample line from the pitches.h library, which defines one note: #define NOTE_B0 31
The first word (#define) just tells the computer what to do.
The second word (NOTE_B0) is the name of the note that you will call in the program when you want the Arduino to play that note.
The third word (31) isn't a word at all--it's a number, of course. That is the audio frequency of NOTE_B0, which is what the speaker will play when you sent it that note.
Notice what else the program allows you to control: the space between the notes. Musicians call these spaces “rests”. Our little melody includes one rest. Can you pick out the rest in the program below?
NOTE_C4, NOTE_G3, NOTE_G3, NOTE_A3, NOTE_G3, 0, NOTE_B3, NOTE_C4
There is one more difference with this program: it only plays the melody once, and then stops. This is because the code for the melody was not put into the LOOP part of the program, but in the SETUP portion of the program.
To play the melody again, you either have to reflash your Arduino, which is pretty tedious, OR you can simply reboot the Arduino. Find the button at the corner of the Arduino next to where you plug in the USB cable. The reset button on the Elegoo-brand Arduino is red. (Other brands of Arduino use different colors; some are labelled RESET.)
Simply push that button and the Arduino will reboot, which runs the program it is currently flashed with. And hear your melody again.
Building Tips
Build tips:
- Wire this project according to the Fritzing diagram for Projects 4AD.
- This is a relatively simple project, BUT THERE IS ONE IMPORTANT TRICK!
Because the pins on the speaker do not perfectly line up with the sockets in the breadboard, the speaker will break if you force it. (Sadly, this is reality. Not all electronic components are designed to interface with each other. Unfortunately, our speaker pins are not spaced exactly like the socket spacing on a standard breadboard. So, we have to adapt to that.)
FIRST, use your fingers to bend the pins inward (toward each other) just slightly out of parallel. This will help them align better with the breadboard. Notice the plus (+) sign on the top of the speaker. The pin on that side is Pin 1.
SECOND, align Pin 1 of the speaker with a socket in the breadboard, but don’t push it in yet. Align Pin 2 of the speaker with a socket in the same COLUMN as the first pin. Then you will swivel the speaker by one row or column.
Here are examples: if Column A on the breadboard is furthest from the Arduino, put Pin 1 in Column A, Row 16. (Orange.) Align Pin 2 of the speaker with Column A as well, NEAR Rows 14 or 18–but don’t push it in. It won’t go into Column A without breaking the speaker.
THIRD, turn the speaker slightly by one row or column, so that Pin 2 is aligned with Column B, Row 14 or Row 18 (Blue). Alternatively, you can align Pin 2 with Column C, Row 15 or Row 17 (Green).
If you play chess, you will recognize these patterns as moves the knight can make.
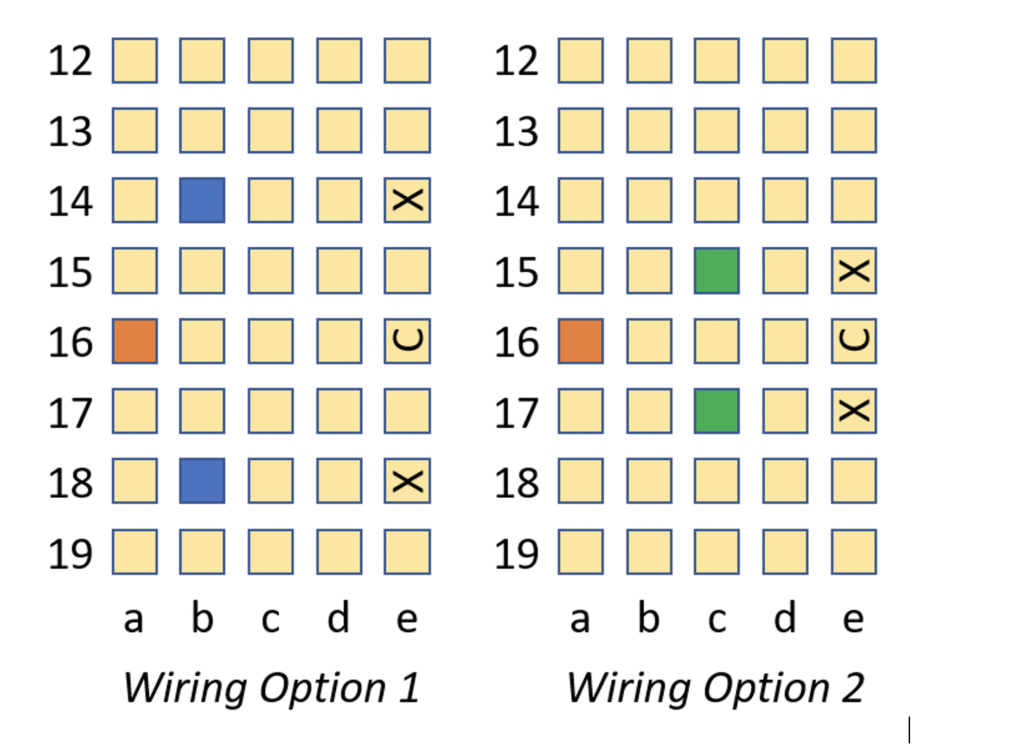
FOURTH, now gently push the speaker down so that the pins seat all the way into the breadboard. When done correctly, Pin 1 will be in Column A, Row 16 and Pin 2 will be either in Column B, Rows 14 or 18 or in Column C, Rows 15 or 17.
Pay careful attention to exactly which column and row Pins 1 and 2 are in. You may even want to write it down. Once the speaker is pushed in, the pins are hidden.
FINALLY, insert the long color jumper wire into the same row that the plus sign on the speaker is close to (marked here with a “C”). Insert the long black jumper into the row the other speaker pin is in (marked with an “X”). Connect the black jumper to the Arduino GND, and the color jumper to Digital Pin 8.
The goal is to connect Digital Pin 8 on the Arduino to the pin with the plus sign on the speaker. The black jumper (from GND on the Arduino) connects to the other (unmarked) pin on the speaker.
As always, Double-check your connections before powering up. UPLOAD AND SAVE the correct/current sketch to your Arduino from the Web Editor.
Expand Your Learning
- Experiment with the RESET button; after the melody plays once, reboot the Arduino by pressing and releasing the RESET button (the red button on the Arduino).
- What do you think you could do with the program code to make the melody play continuously?
- What do you think the variable named NOTEDURATION does in this program?