
↩️ Installing the Line Follower
Let’s install the Line Follower Module!
Here is what you’ll need:
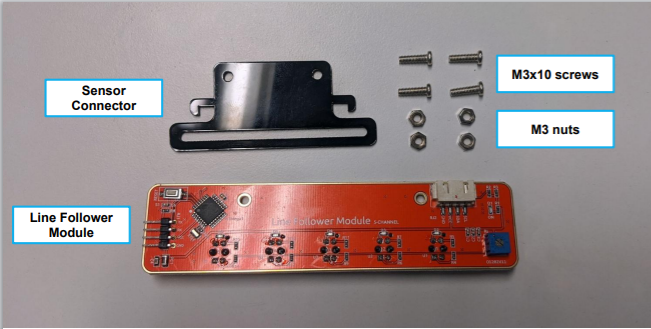
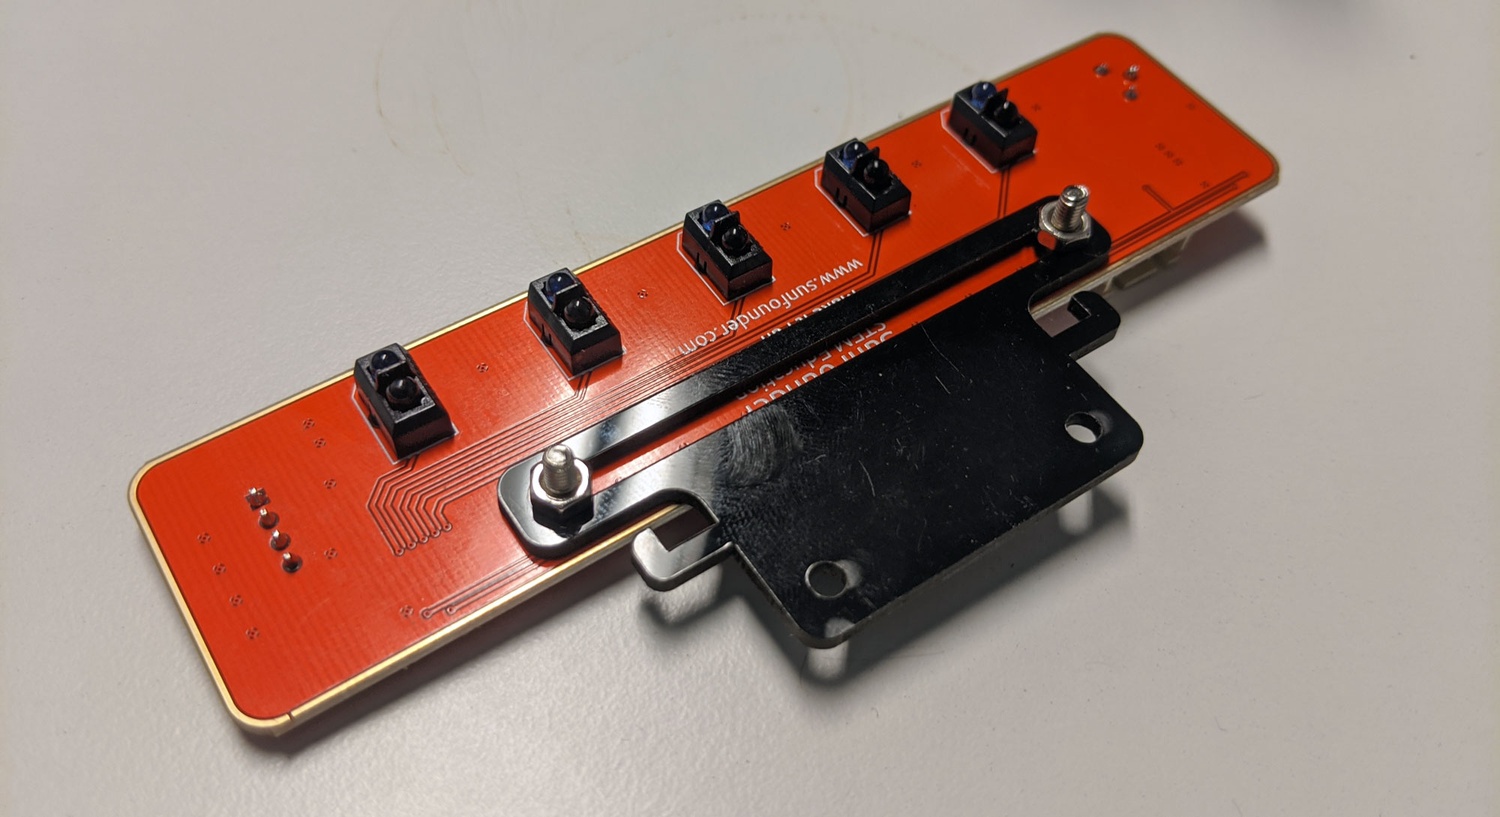
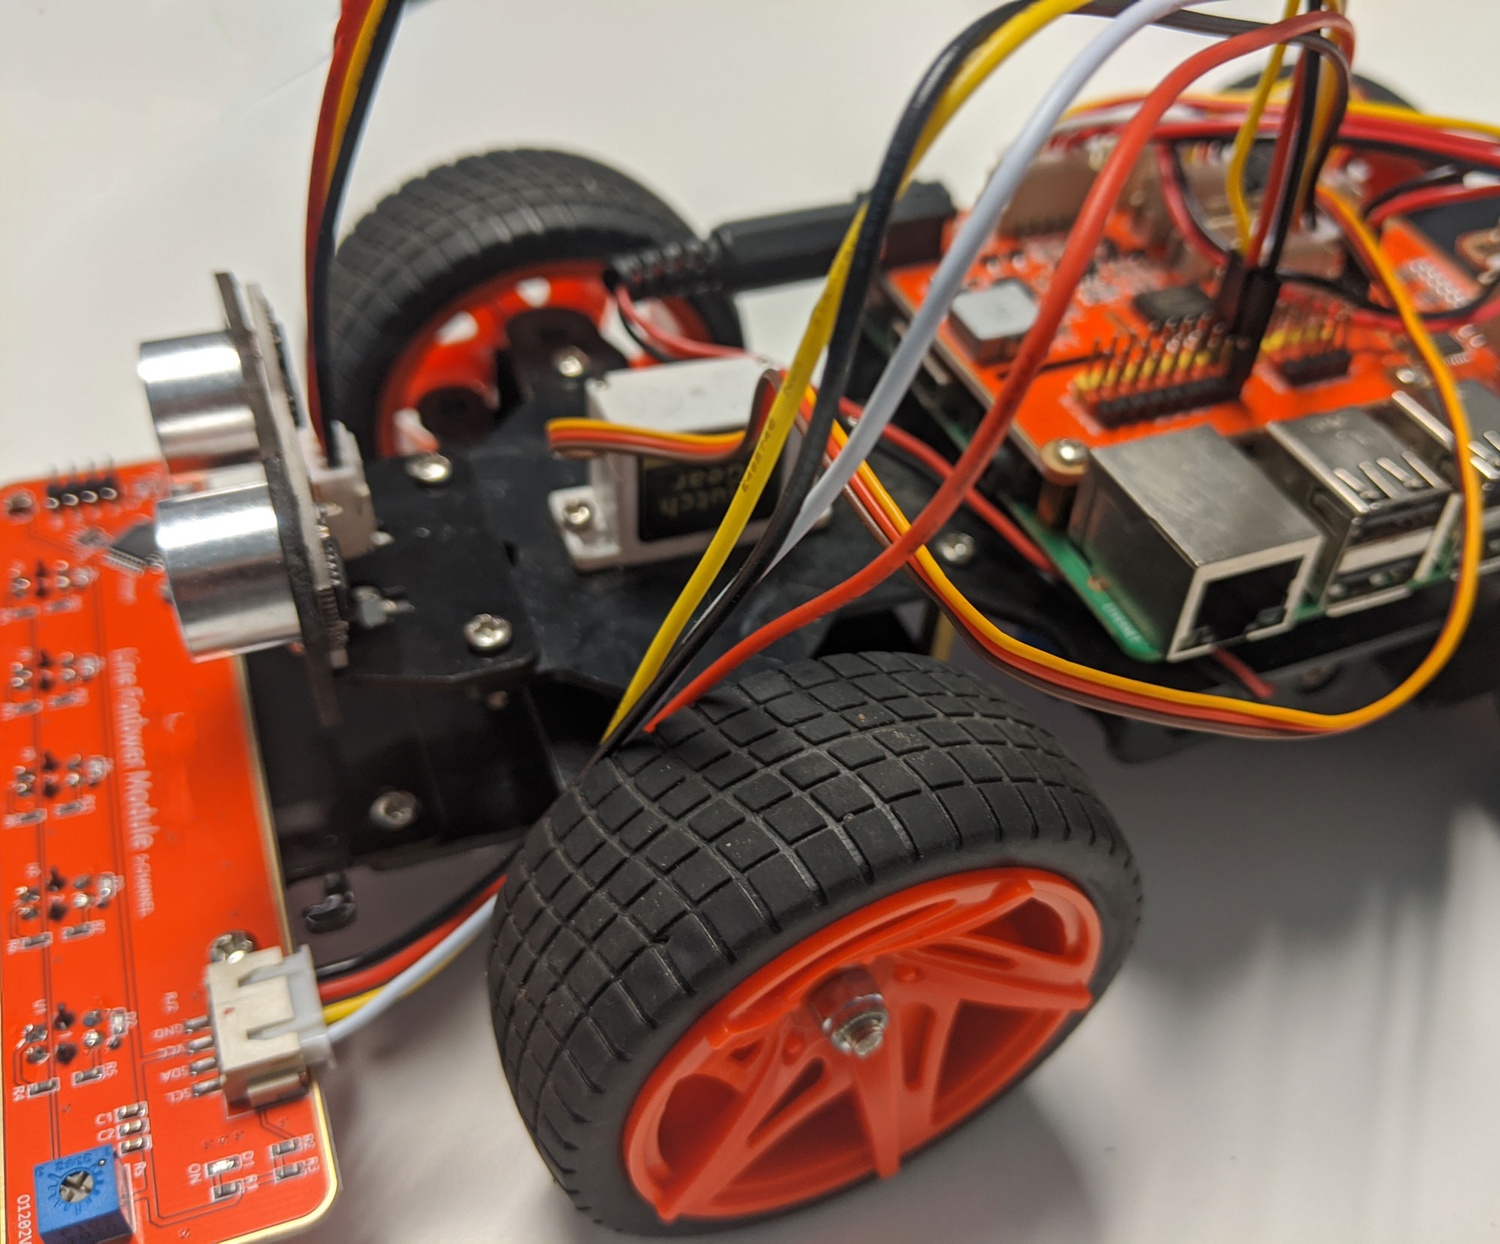
The first step is two take two Mx10 screws and M3 nuts and attach the Line Follower Module using the wide slot on the acrylic attachment plate.
Using two more of the same screws, screw the attachment plate onto the lower front frame of your car.
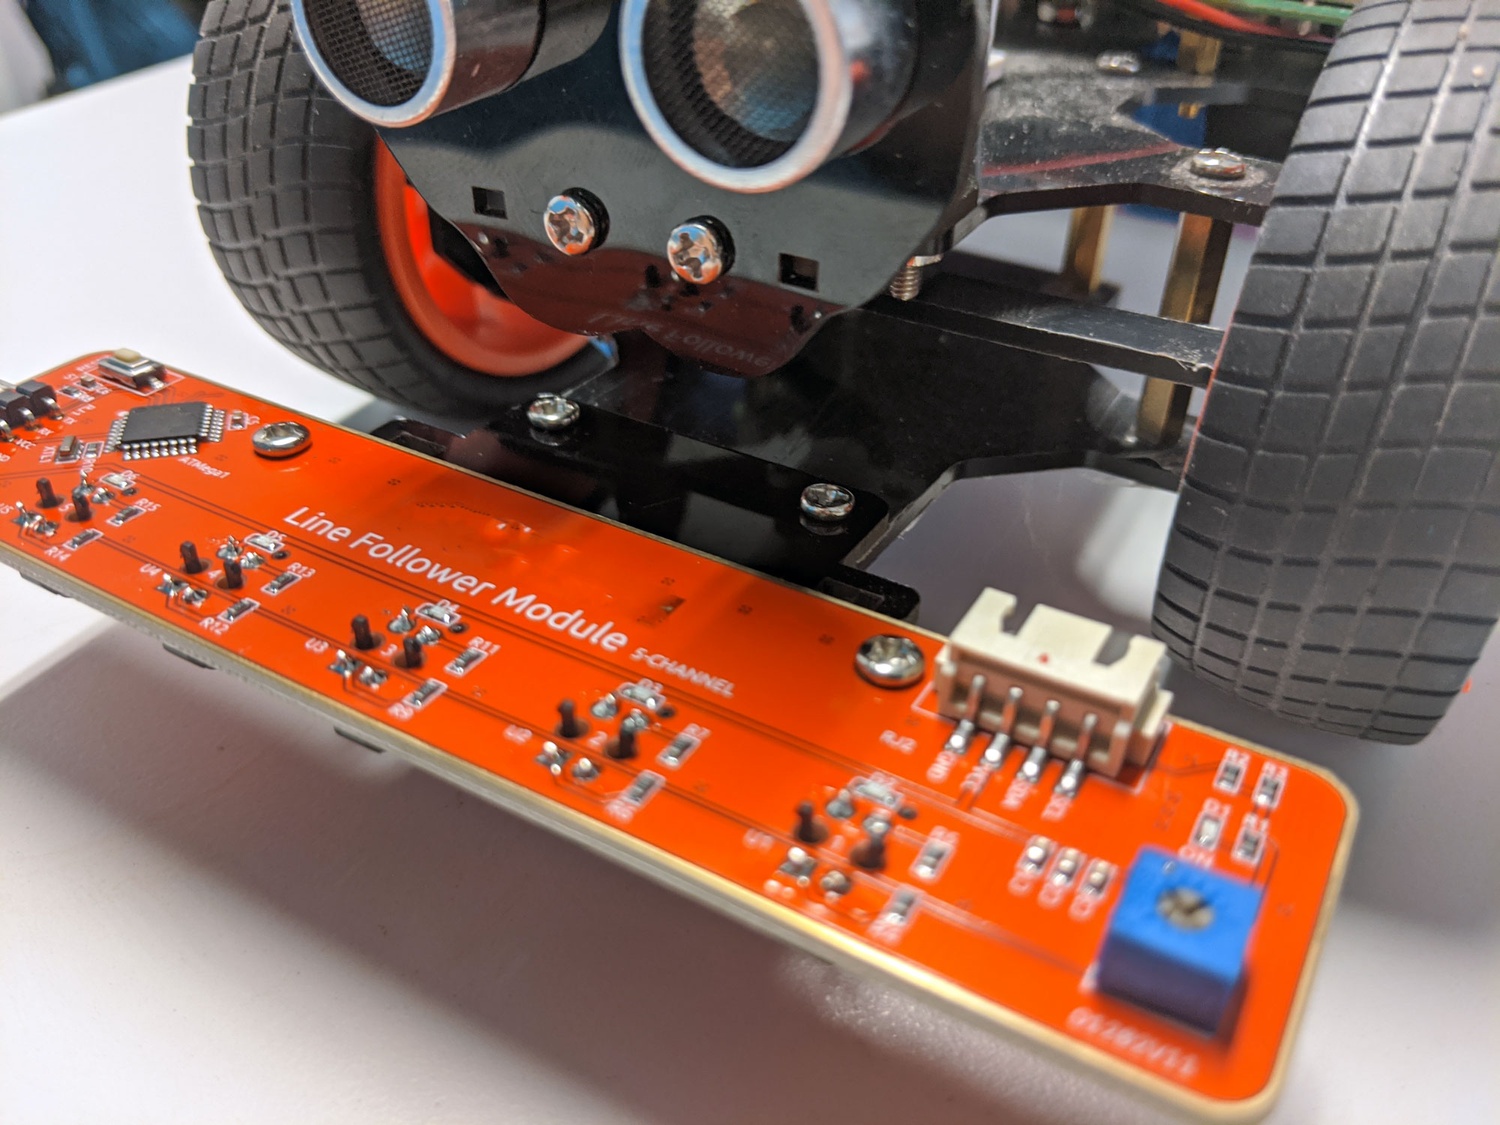
Now find the 4-wire connector cable with white connectors on each end.
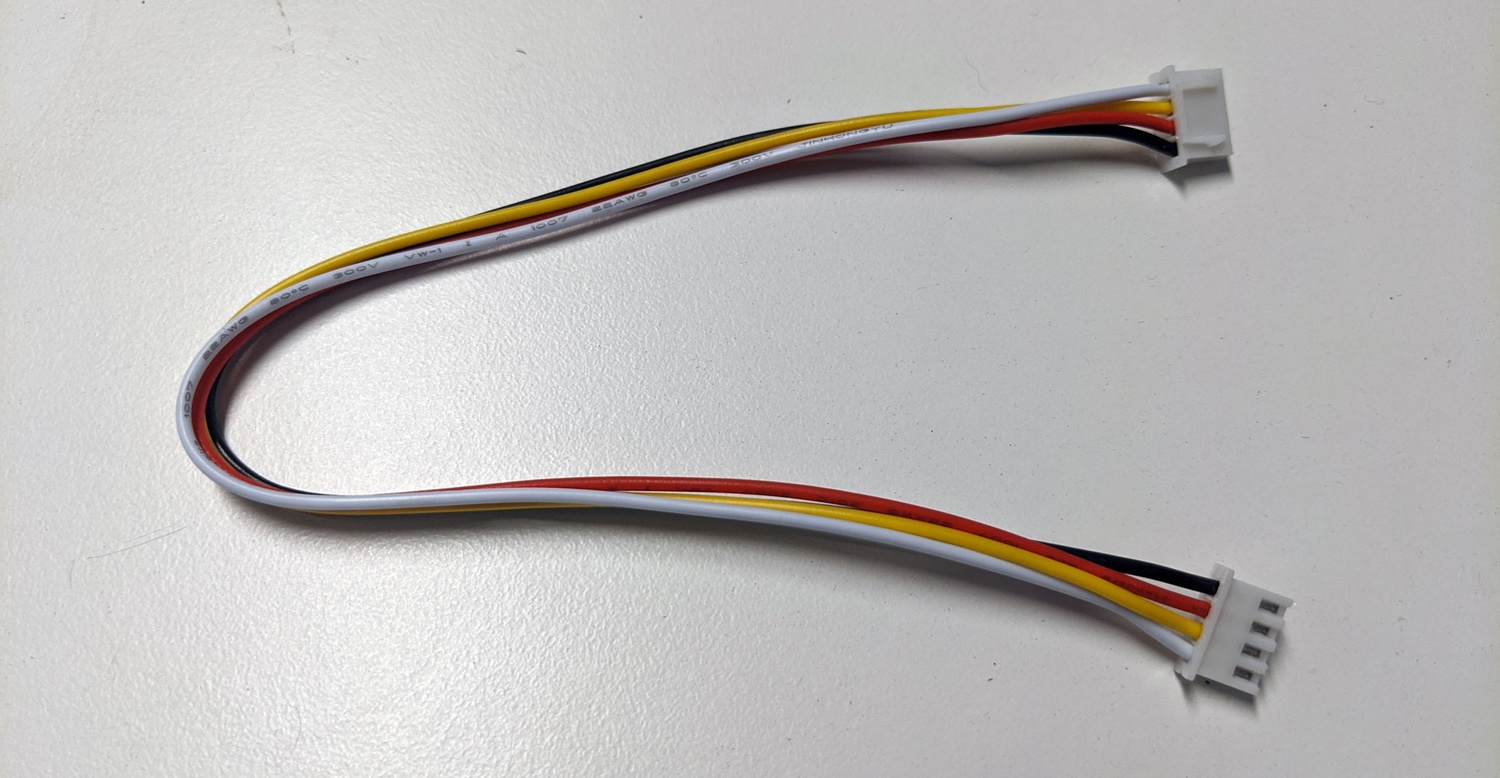
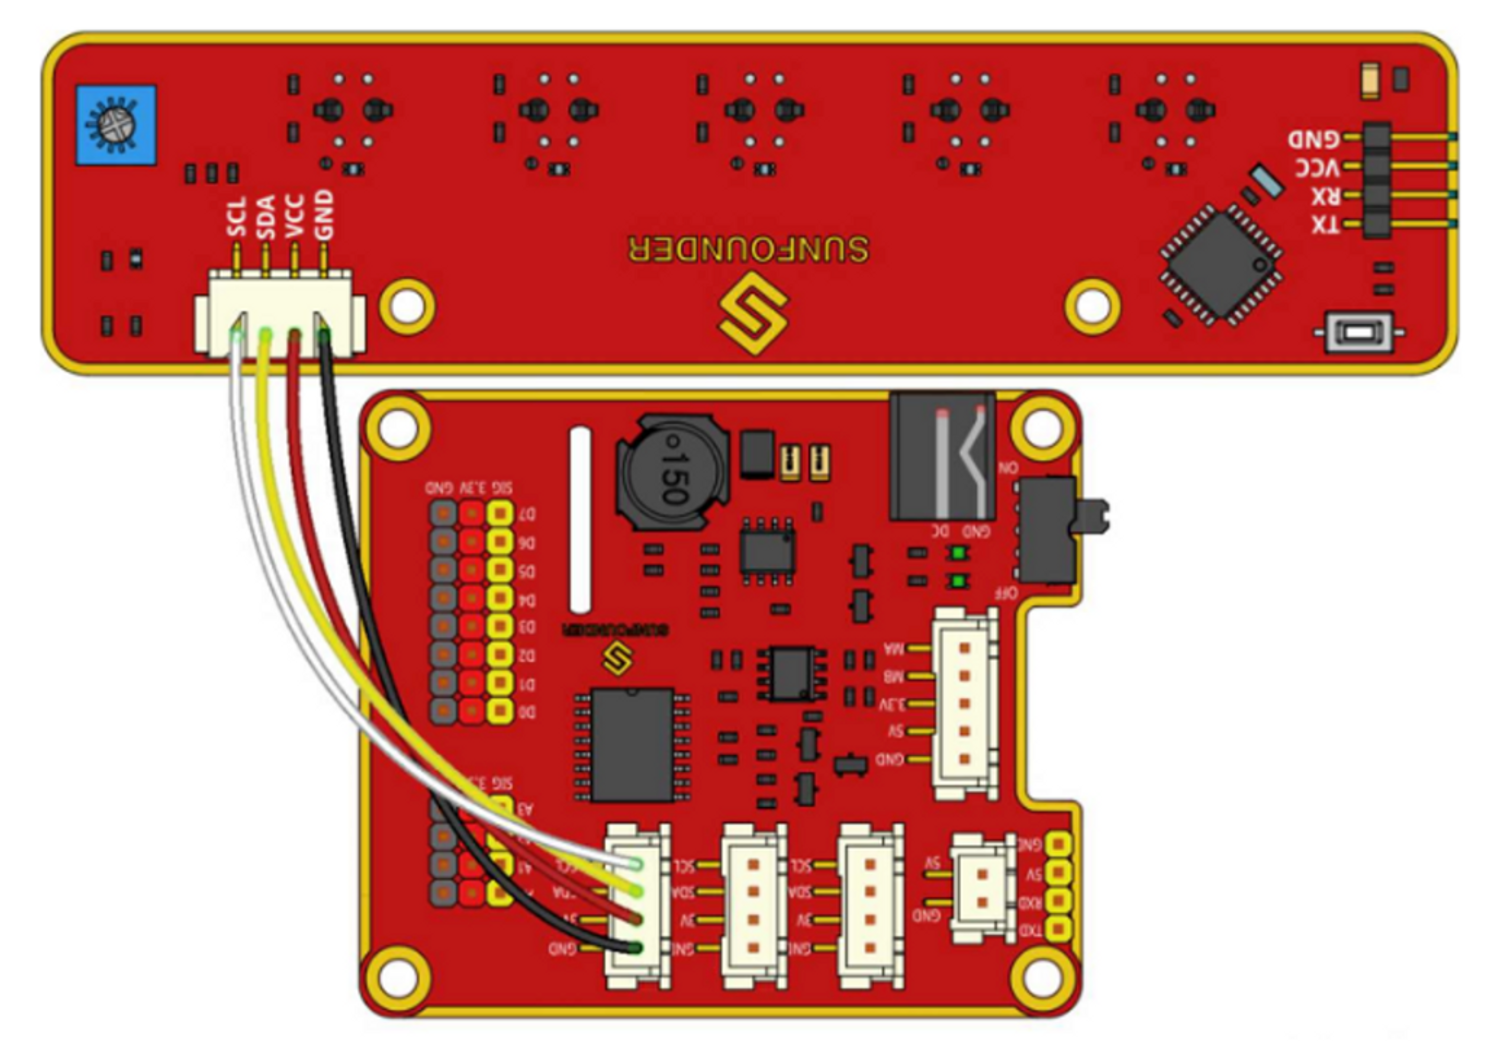
Plug the connector into the Line Follower Module and plug the other end into the red board attached to the Raspberry Pi per the wiring diagram below.
Note: Some of the wires may have different colors than what’s shown in the diagram but the orientation is what’s important! Check that the labels on the connectors (SCL, SDA, VCC, GND) go to the correct position.
On to the Next Section!