
🔊 Installing the Ultrasonic Distance Module
The first thing we need to do is install the Ultrasonic Obstacle Avoidance Module onto the front of our car. These are the components that you’ll need to start:
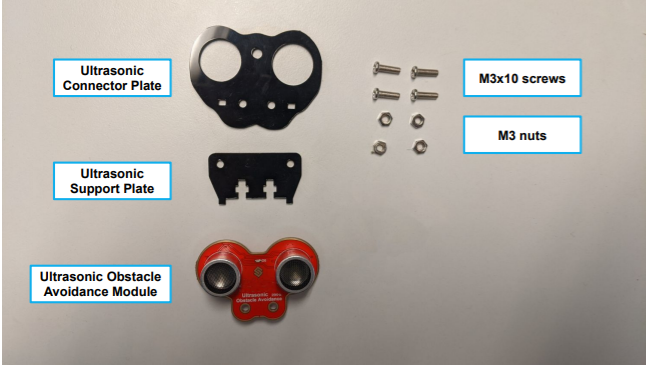
Installing the Ultrasonic Module
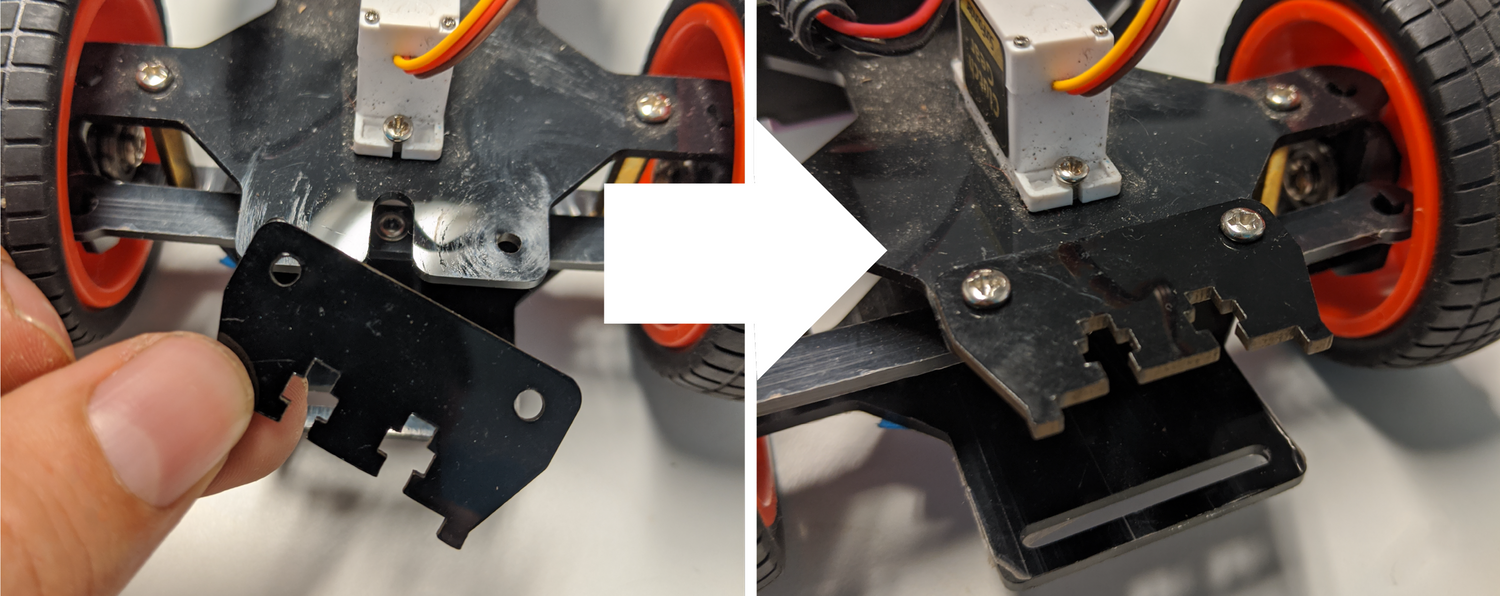
First, attach the Ultrasonic Support Plate to the front of the car with two Mx10 screws. Use a Phillips head screwdriver along with pliers or the small wrench included in your kit to hold the M3 nut.
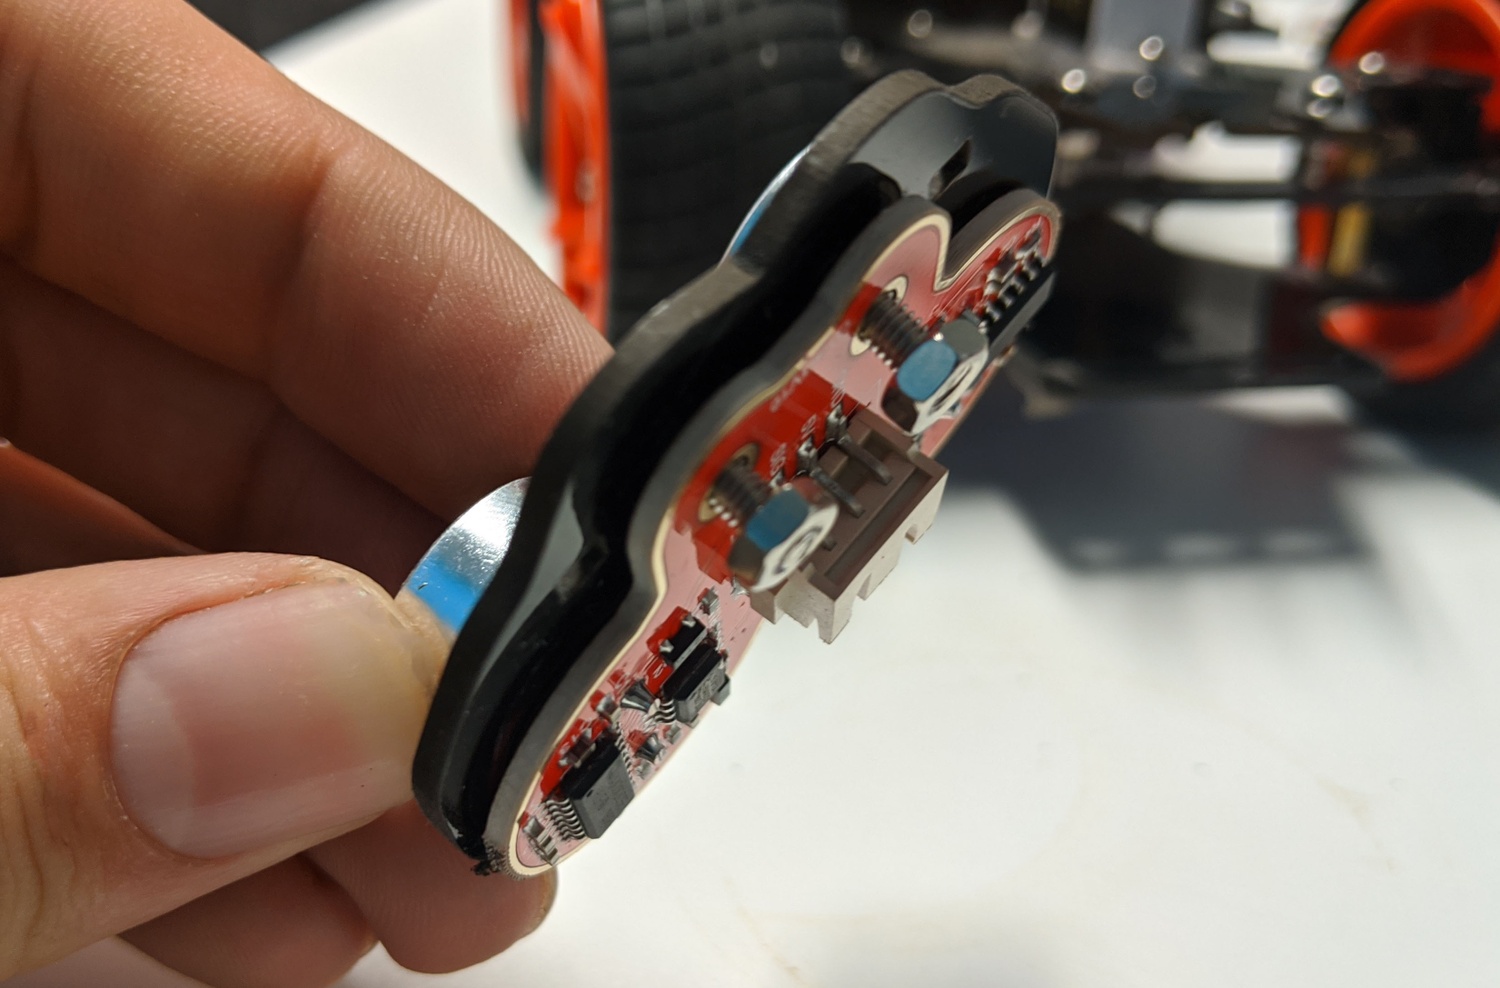
Next, find the Ultrasonic Obstacle Avoidance Module and place the two round sensors on the board through the holes in the Ultrasonic Support Plate. Then, loosely screw two Mx10 screws through the holes in both the plate and the module and cap the screws with M3 nuts. Keep the nuts all the way at the end of the screw (don’t tighten down).
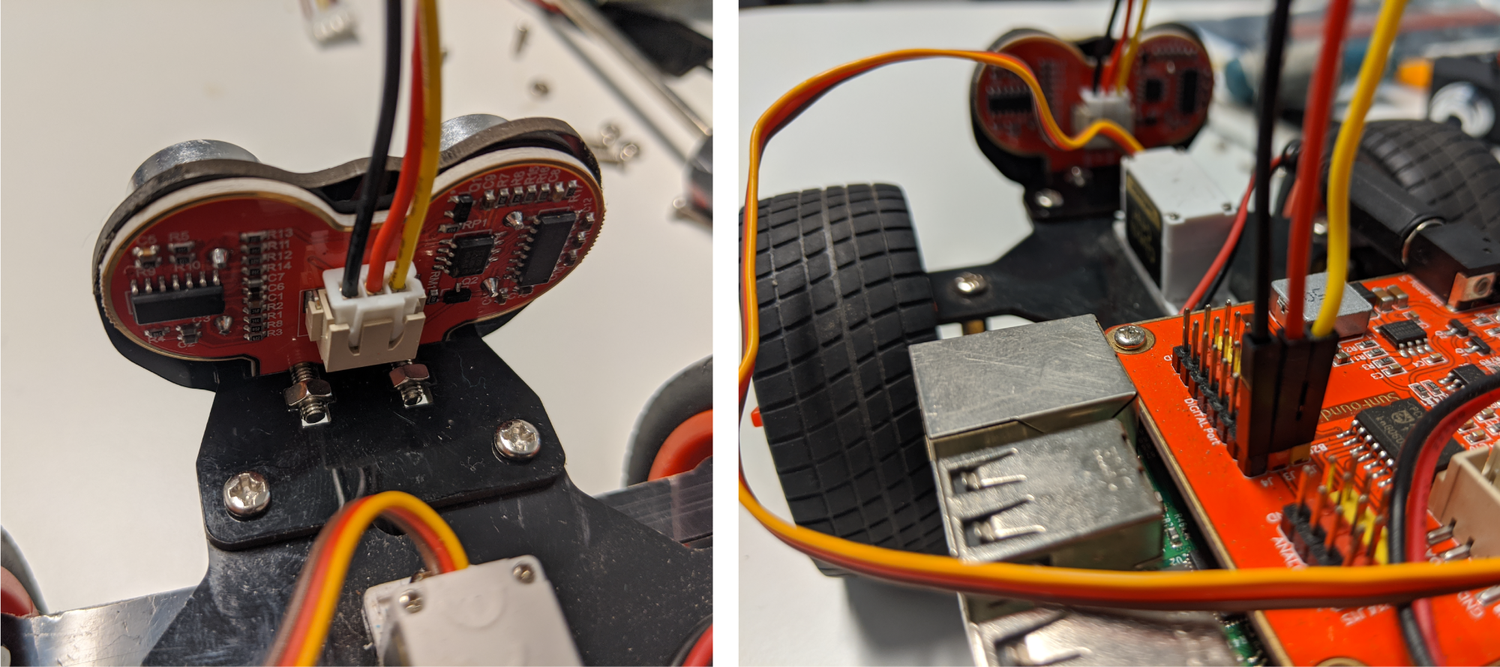
Now, slide the nuts connected to the screws into the wide part of the notches on the mounting plate you screwed onto the car earlier. Rotate the nuts until they slide fully into the notch. Then, tighten the screws so that the assembly is secured to the mounting plate.

Find the long wire with a white 3-slot connector on one end and 3 separate female pin slots on the other end.
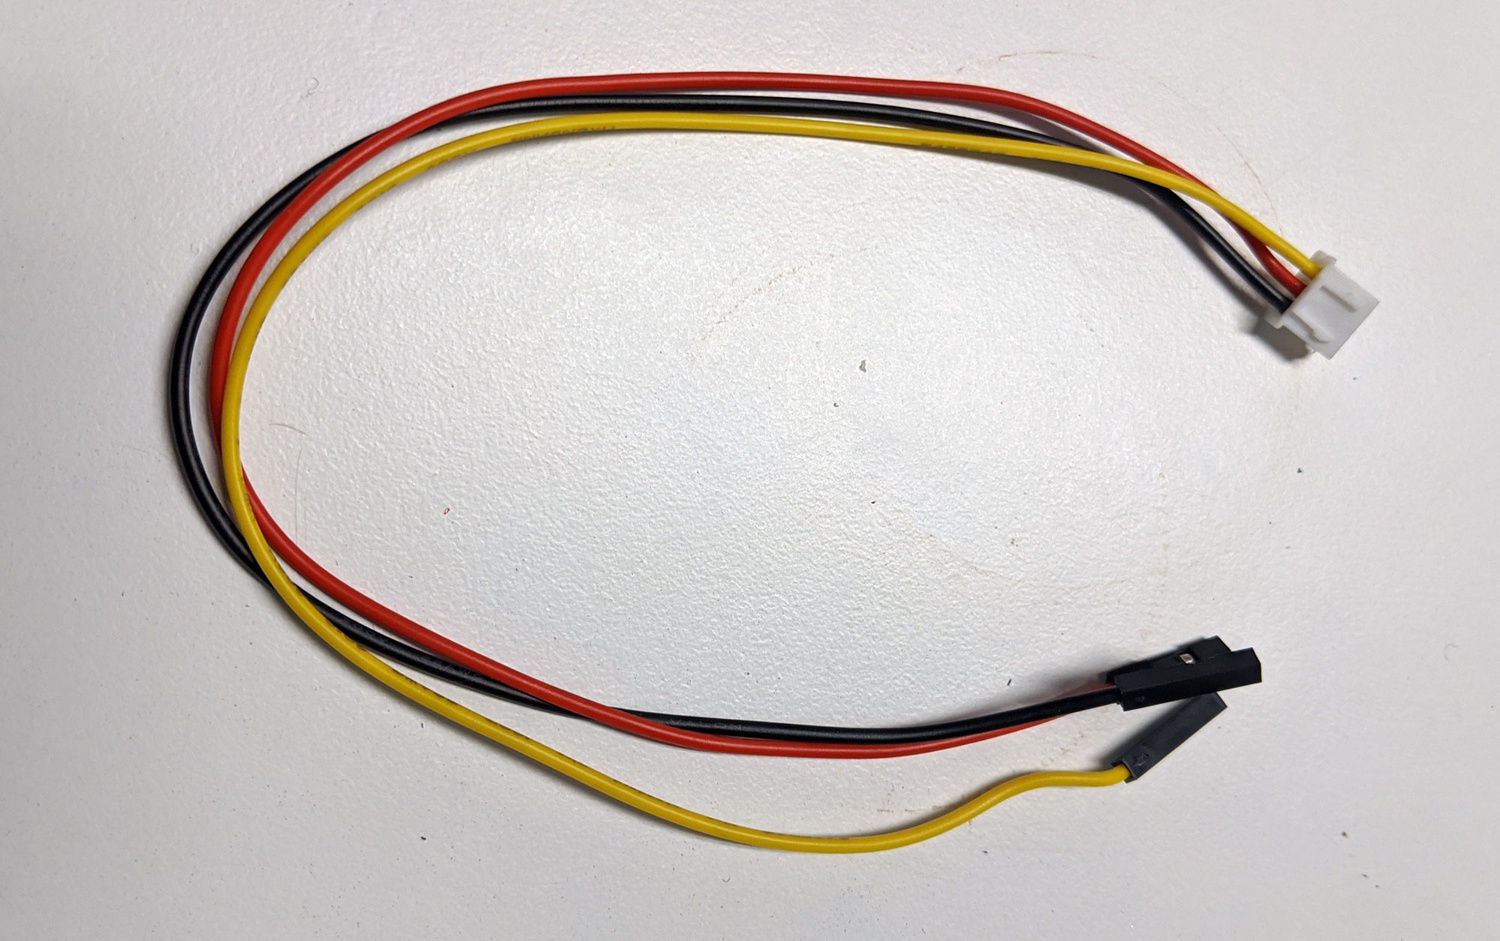
Plug the white connector into the back of the Ultrasonic Obstacle Avoidance Module (note that is only goes in one way). Then, plug the three pins into the red board on top of the Raspberry Pi on the B20 pins as shown below. Note that the pins are color coordinated to make it easy to see which wires should be plugged in where.
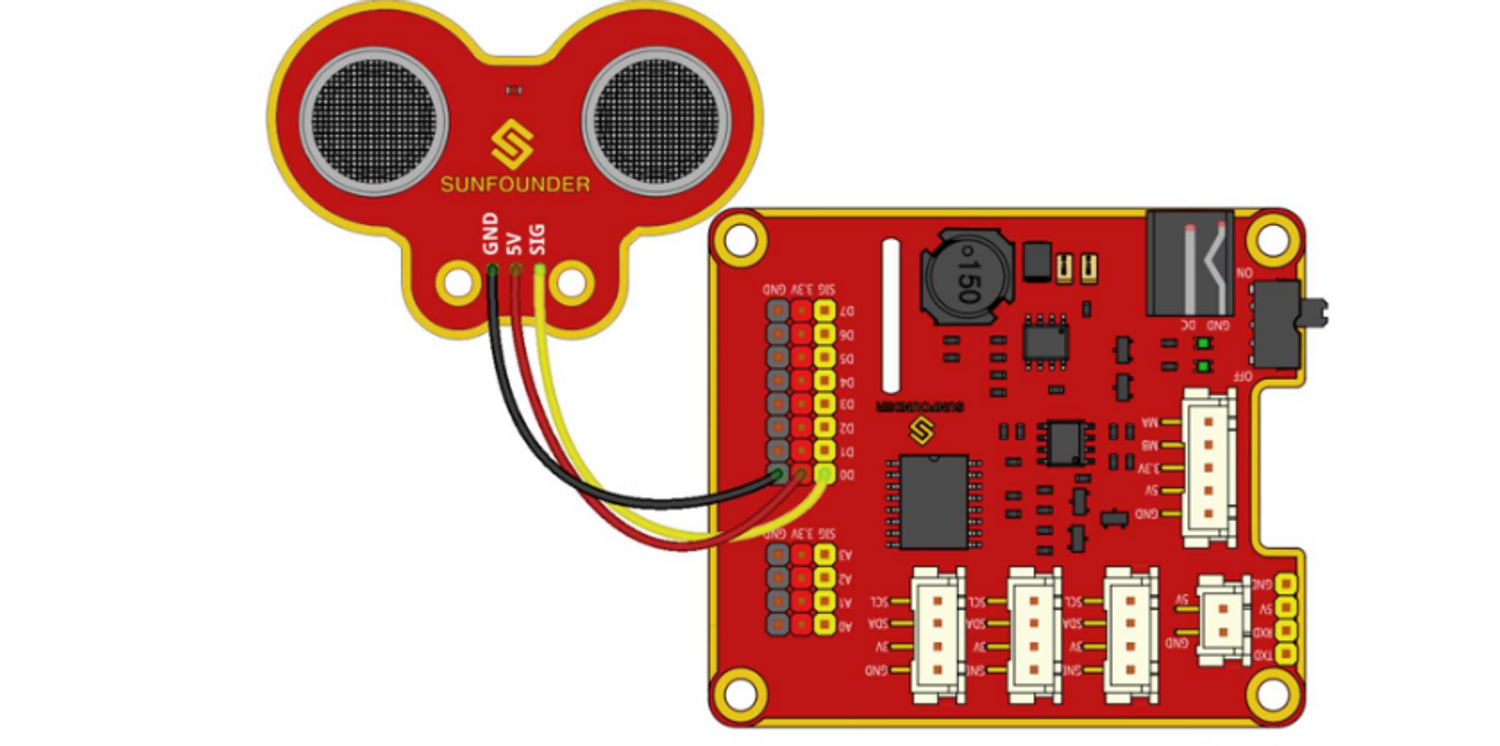
Ultrasonic distance module wiring:
That is it! Next will will install the Line Follower.