❗️Extension: Executing Commands with Sound Recognition
Set Up the Environment
In this tutorial, we will use voice commands to control a sprite’s actions. A sprite is a two-dimensional visual icon used in computer graphics. They are typically used for characters or other moving objects in video games.
The steps to complete this project are similar to the last section, but with a few more steps in block coding. They are as follows:
- Choose what you want to do with your sprites, as a general idea. In my example, I will be choosing sprites of different bird species.
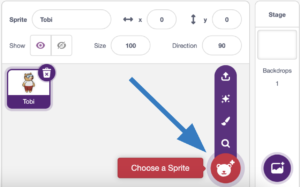
- To choose your sprite, open up the “Block Coding” environment after you open up PictoBlox. At the bottom right corner, look through different sprite options and choose. In the video, I also show you how you can upload your own unique sprite from pictures on the Internet.
- You may even see the different pre-set costumes attached to each sprite. If you are into graphic or video game design, this would be a good activity to diversify your characters.

- Under file at the top left,choose “new” and save your project with a specific name, as you will come back to it later.
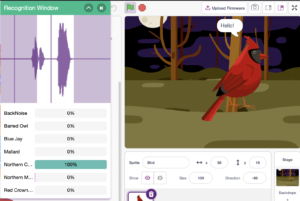
- Open up the Machine Learning (ML) Environment. This is where we will create the audio data to command different abilities for the sprite, like jump, walk, switch costumes, spin, speak, and whatever else you can think of. In my case, I will name a different bird species for each class and attach sounds corresponding to that bird.
- Now, train and test your model with enough samples for each class, just like we did in the previous section.
- Once you are done, choose “Export Model” to the top right of the Testing Box. This will upload the ML to the Block Coding environment.
- Now you can open the correct file and sprite you were working on before.
Write the Script in Block Coding
We will be making a script that uses our model to analyze the audio samples we made using our device’s microphone. Once that’s done, our sprite will follow the commands we have programmed.
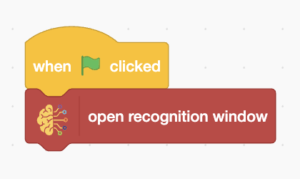
- First, add a when flag clicked block from the Events palette.
- Follow it up with an open recognition window block from the Machine Learning palette.
- Now drag a when ( ) is predicted block from the Machine Learning palette. Select the class as BackNoise.
- Under the block, add what you want your sprite to do. Below we have made examples of different block commands or play around with it yourself!

Finally, click on the green flag above your sprite to test the script.