
🤟 Hand Pose Classifier
Getting Started with the Hand Pose Classifier
The Hand Pose Classifier is used for classifying different hand gestures into different classes. A class is like a label or category where you would put all of your similar images.
The model works by analyzing the position of your hand with the help of 21 data points. We’ll look at this in detail in the video or written tutorial.
Steps:
Setting up the Environment
- We begin by making the machine learning model in Pictoblox. When you open the software, select the “Machine Learning Environment” option.
- Click on “Create a New Project.”
- Type in a project name of your choice and select the “Hand Pose Classifier” extension. You can be as specific as you want for a project name, but it is usually a good idea to include the date and the general idea you are working on. For example, if I want to teach the machine American Sign Language, then I might put “12/9/2022 ASL symbols.“
- Click the “Create Project” button at the bottom right corner to open the window.
- Inside this workflow, there are two classes already made for you. Change the class’ names before you start making it, or you won’t be able to change it later.
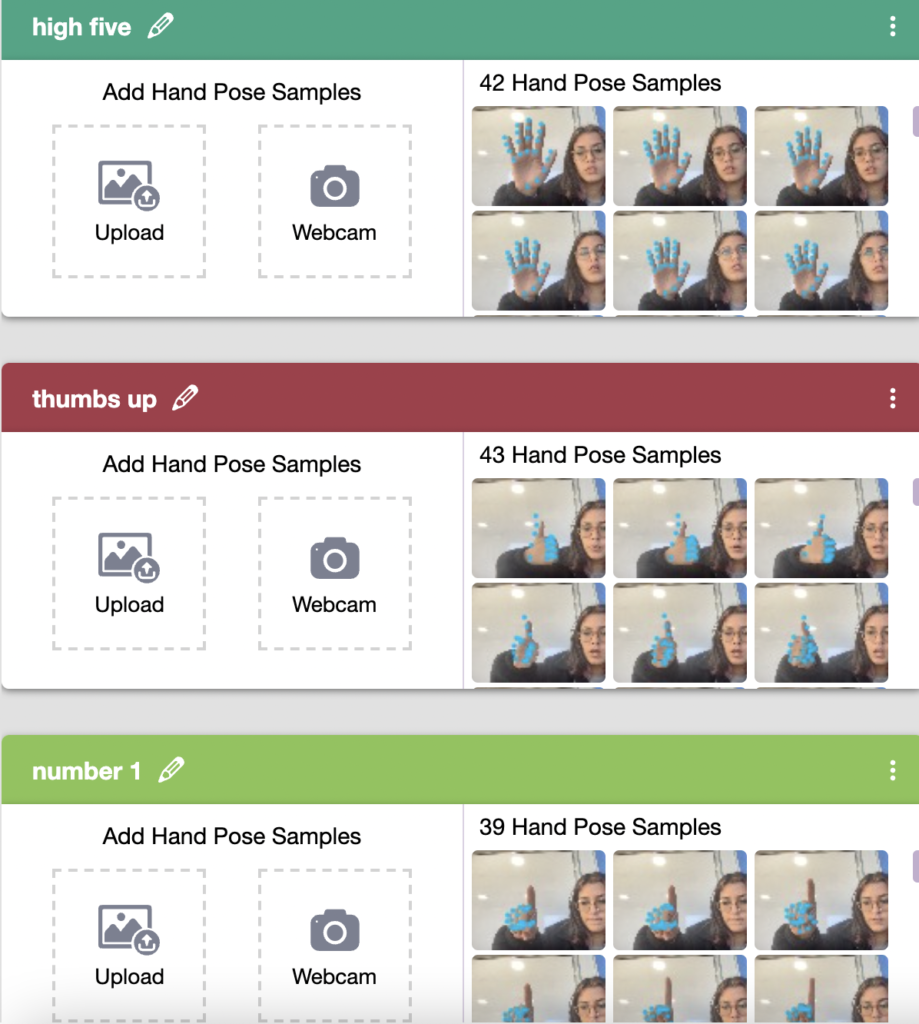
Collecting and Uploading the Data
- Upload your data to your class by uploading your own pictures or using the webcam (recommended). When using the webcam, click on the “Hold to Record” button to capture the pic.
- Start with 30+ pictures of each class. The more data, the better results! Try out different angles, proximity to the webcam, lighting, etc.
Training the Model
- By training the model, we extract meaningful information from the images (the 21 data points), and that in turn updates the weights. A weight is a parameter that decides how much influence the input will have on the output.
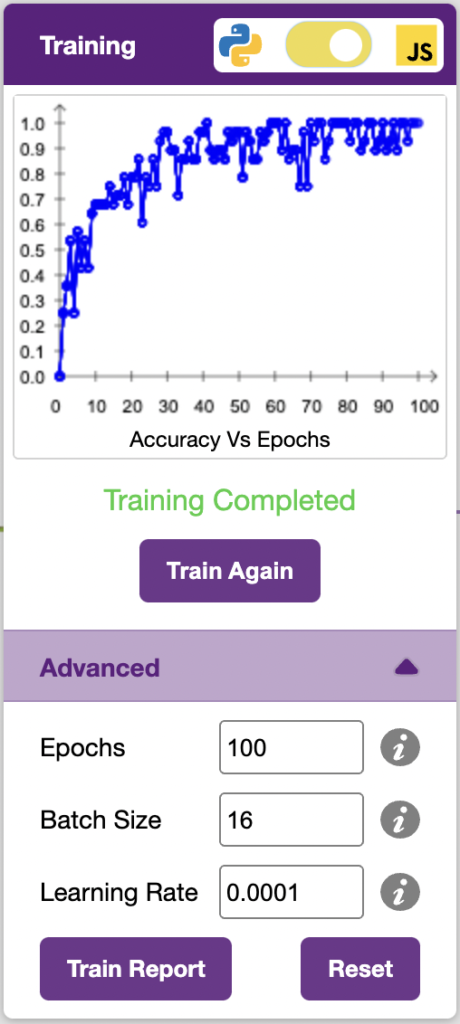
- When you click the “Advanced” tab, you will see three hyper parameters.
- Epochs– The total number of times your data will be fed through the training model. Therefore, in 10 epochs, the dataset will be fed through the training model 10 times. Increasing the number of epochs can often lead to better performance.
- Batch Size– The size of the set of samples that will be used in one step. For example, if you have 160 data samples in your dataset, and you have a batch size of 16, each epoch will be completed in 160/16=10 steps. You’ll rarely need to alter this hyperparameter.
- Learning Rate– It dictates the speed at which your model updates the weights after iterating through a step. Even small changes in this parameter can have a huge impact on the model performance. The usual range lies between 0.001 and 0.0001.
3. Click on the “Train Model” button to start training. The higher the reading in the accuracy graph, the better the model. If the model accuracy is bad or below “moderate,” then try increasing the epochs or adding more samples. The range of the accuracy is 0 to 1.
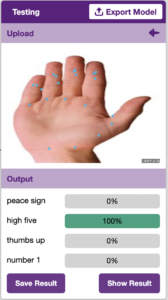
Testing the Model
Now that the model is trained, let us see if it delivers the expected results. We can test the model by either using the webcam again or by uploading a new image. The model will start predicting based on the image in the window.
You did it! Give yourself a hand 👏
Reflections
Do you think the data would work better if there were more than 21 hand points for each sample?
What system would benefit from trained hand gestures?
What could you do to improve your own model?