🚗 Step 1: Rear Wheels
Estimated time: 10 mins
Let’s start building this thing! Take it one step at a time and if you get stuck give yourself a break, ask for help, or check back in with these guides.
Note: Depending on which version of the Robot Car you have received, the Back Half Plate will either have two or four separate inserts to slip in or it will come pre-fused.

Note: Some kits include four vertical black T-shaped pieces. If yours looks like the picture below, place one on each side of the yellow motor and use four M3x30 screws with four M3 nuts instead.
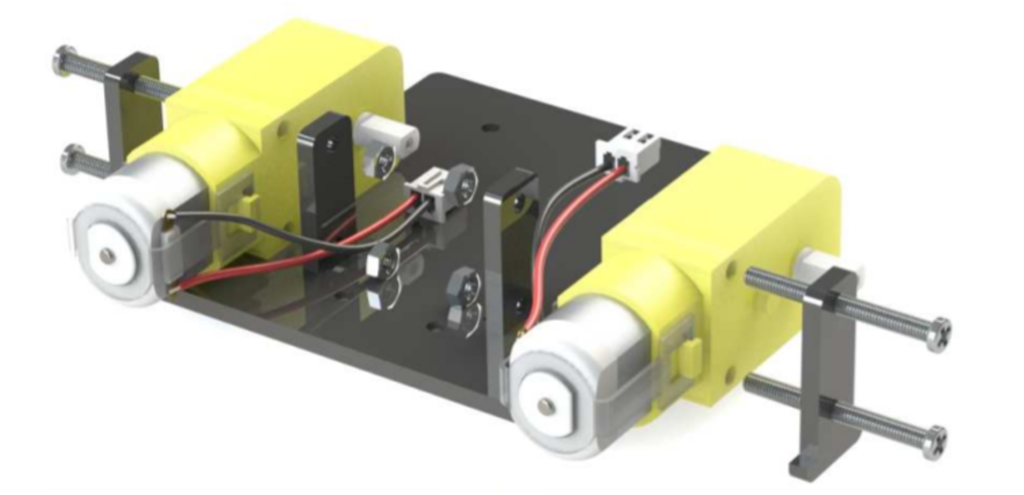
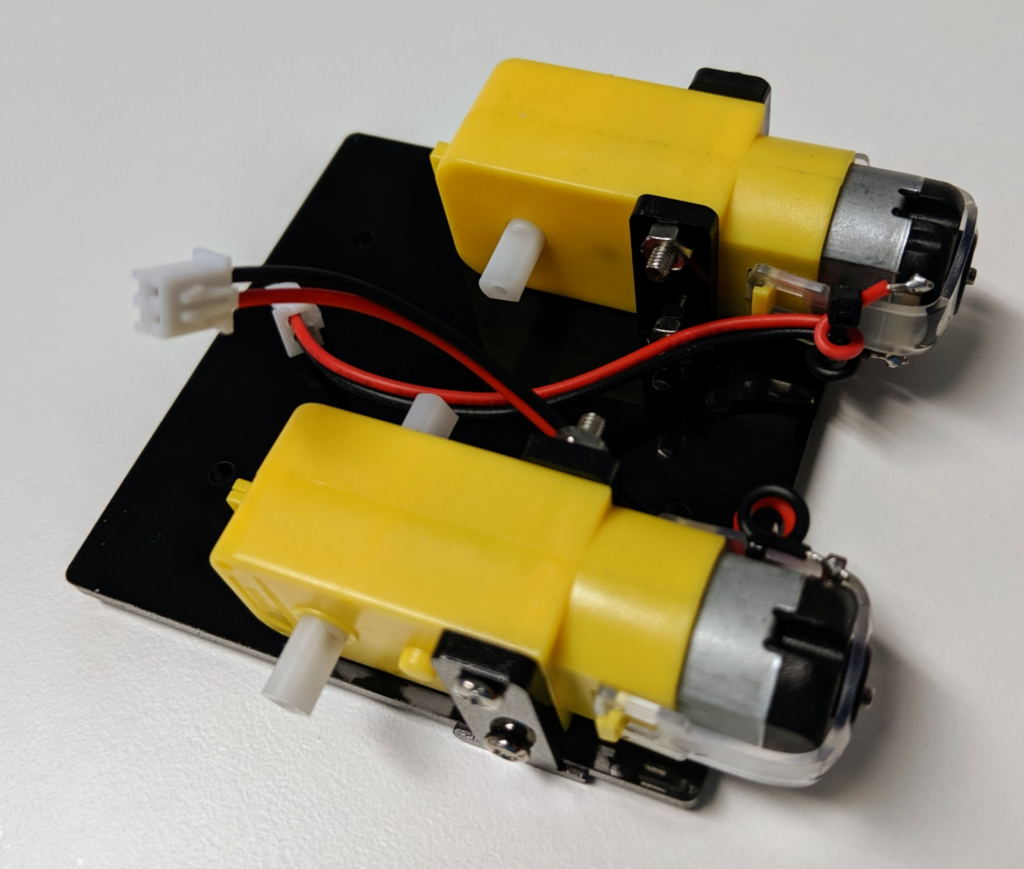
The first step is to assemble the rear wheels. It should look like this:
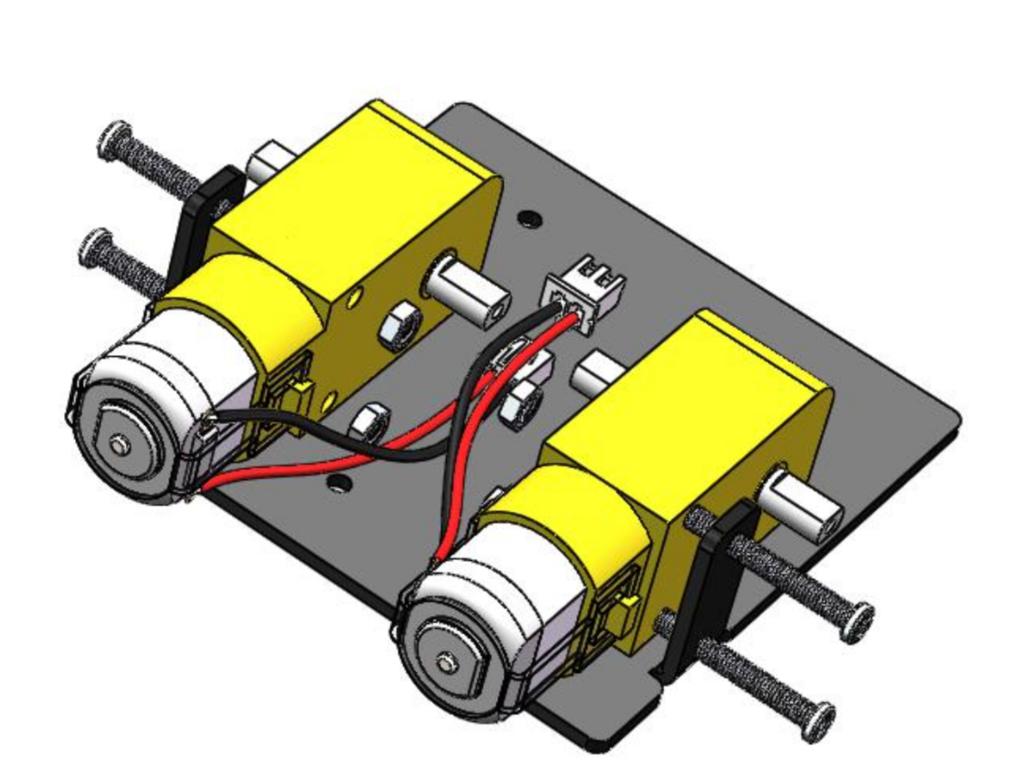
Grab the yellow motors and back half chassis. Use four M3x25 screws and four M3 nuts to assemble the two motors as shown in the diagram below. When installing the motors onto the chassis, make sure that the red and black wires are facing the inside, like this:
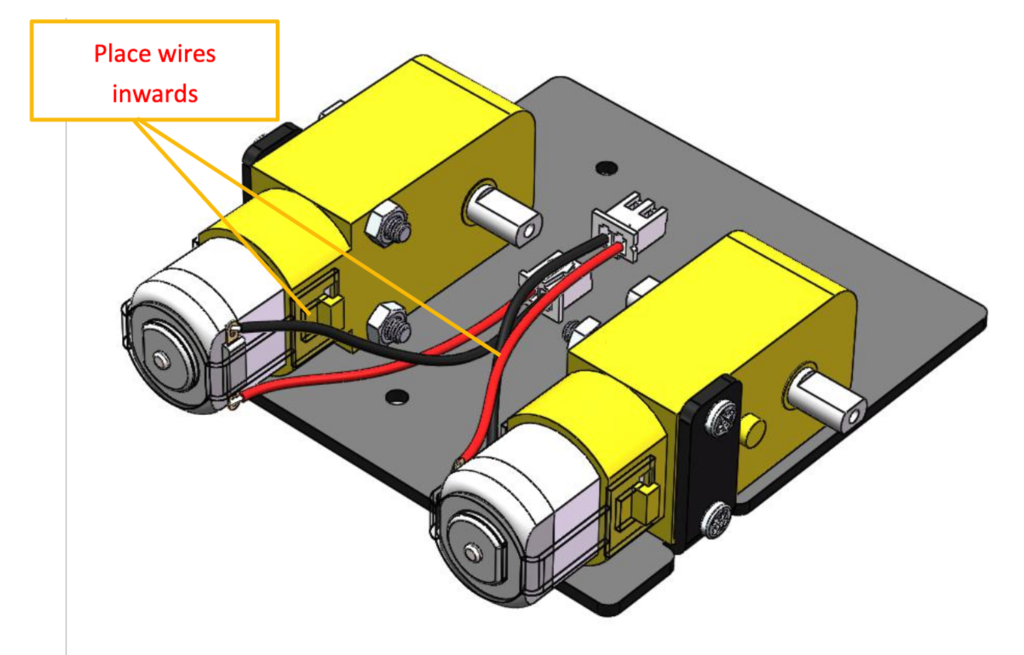
This makes it a lot easier for future steps. Once you finish this part, place your assembly to the side.
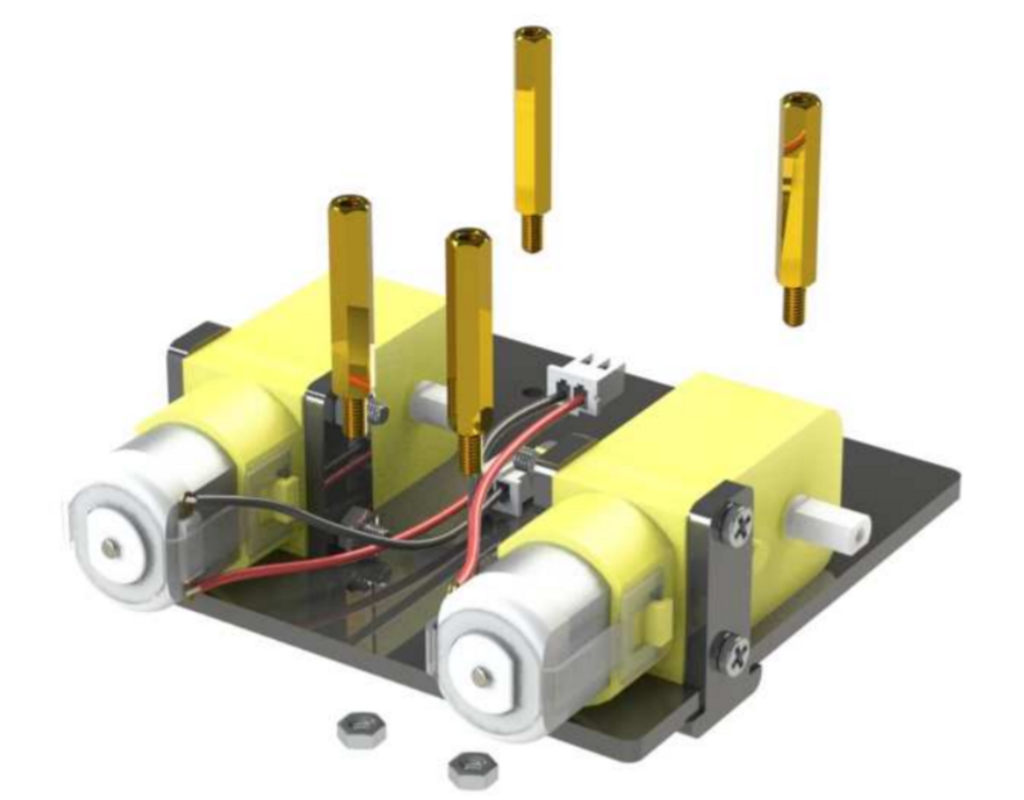
Note: If your upper plate does NOT have raised tabs (see next section) and instead is completely flat, continue with these directions to complete your motor section: Insert four M3x25 copper standoffs through the acrylic plate into four M3 nuts as indicated in the photo.