🏋️ Step 2: Upper Plate Body
Estimated time: 15-20 mins
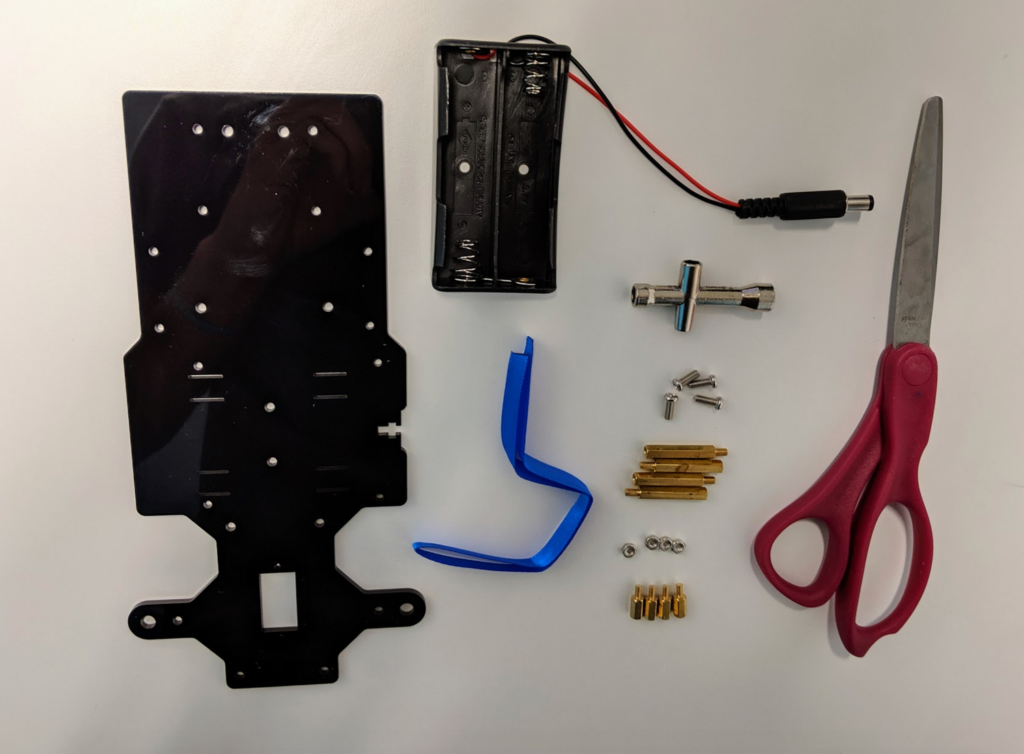
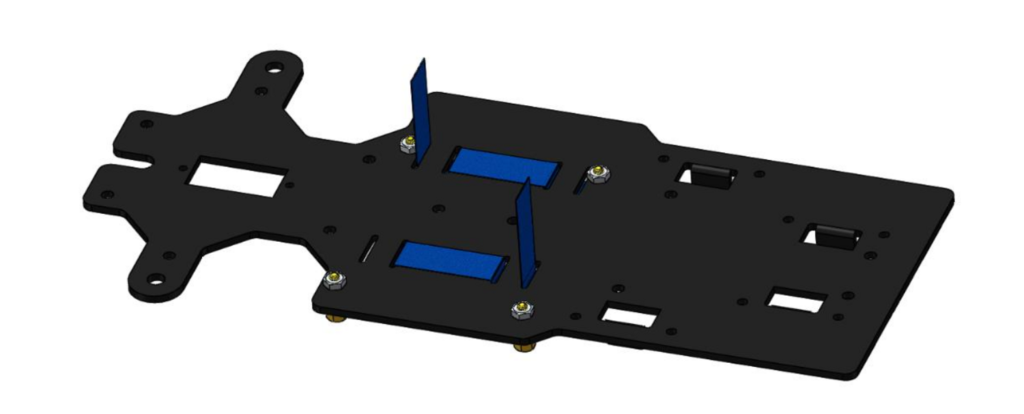
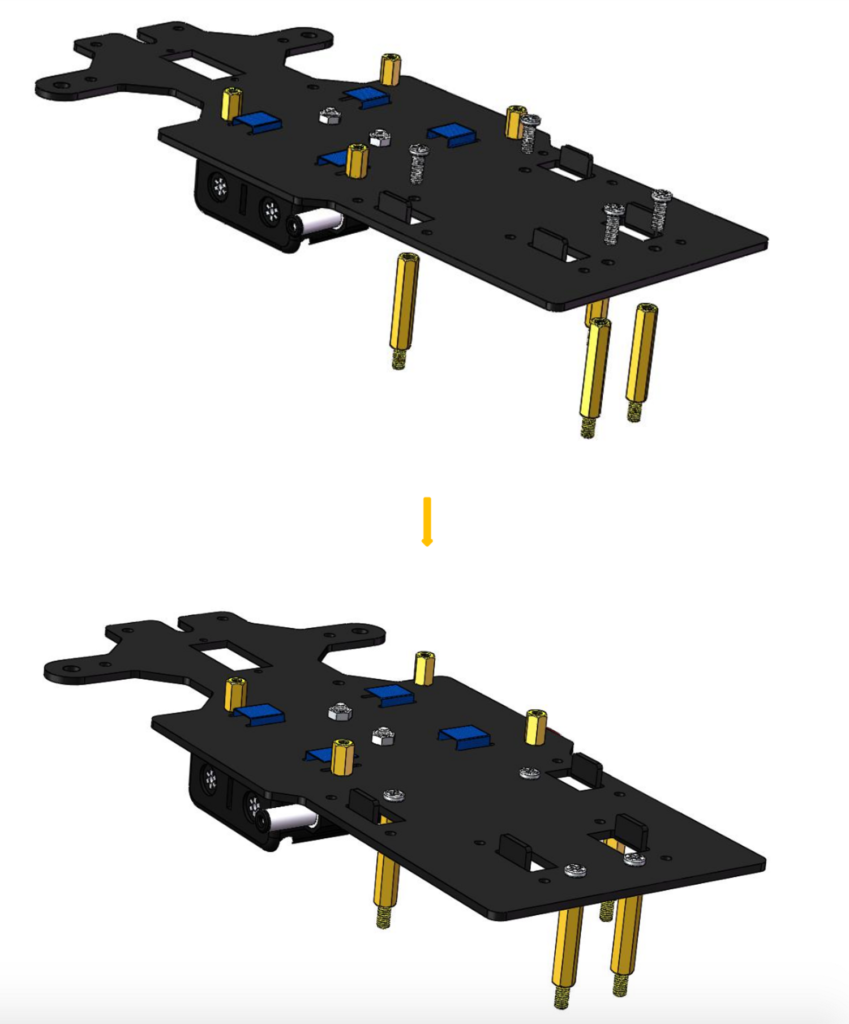
Next, let’s build the upper chassis plate. Use four M2.5×8 copper standoffs and four M2.5 nuts for this part. Insert the standoffs to the upper plate as shown.
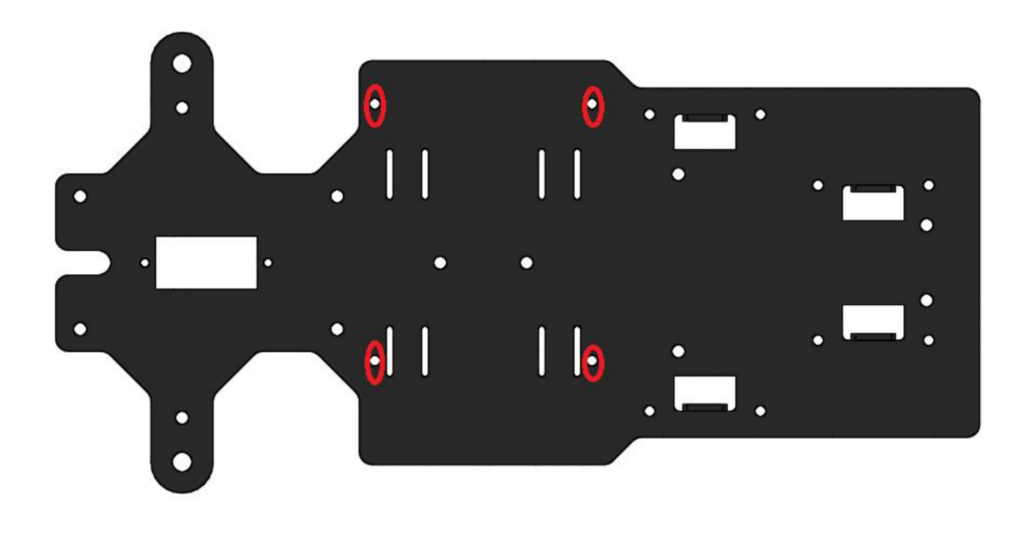

Make sure that the standoffs are on the correct side of the plate. Note the four small raised tabs on the right side of the diagram to know which side to screw in the standoffs.
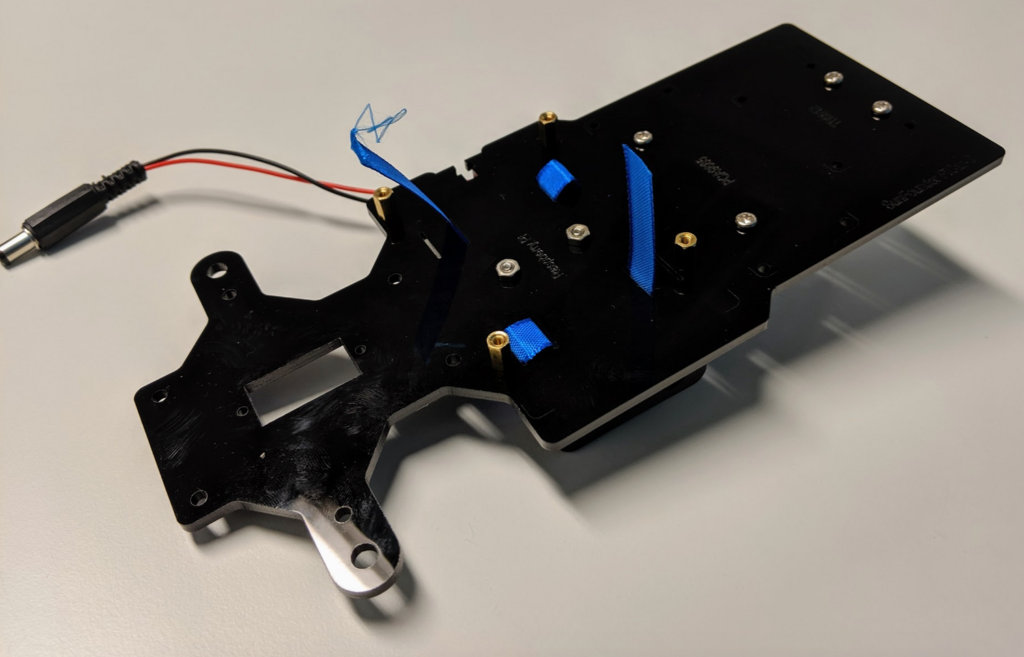
Note: Be aware that some plates will not have these lifted tabs; if yours doesn’t, look for etched words that say things like Raspberry Pi or PCS9685 to determine which face is the chassis top and place the standoffs on the same side as the writing. If you have this version of the upper plate, you will be inserting twelve M2.5×8 copper standoffs and twelve M2.5 nuts into the chassis.
Next, flip the plate around to install the battery holder.
You may have been wondering why there was a blue ribbon in the materials list. The ribbon is inserted in the battery case to make it easier to pull batteries out for charging.
Cut the ribbon in half to make two pieces and thread each ribbon into the holes in the upper plate as shown above.
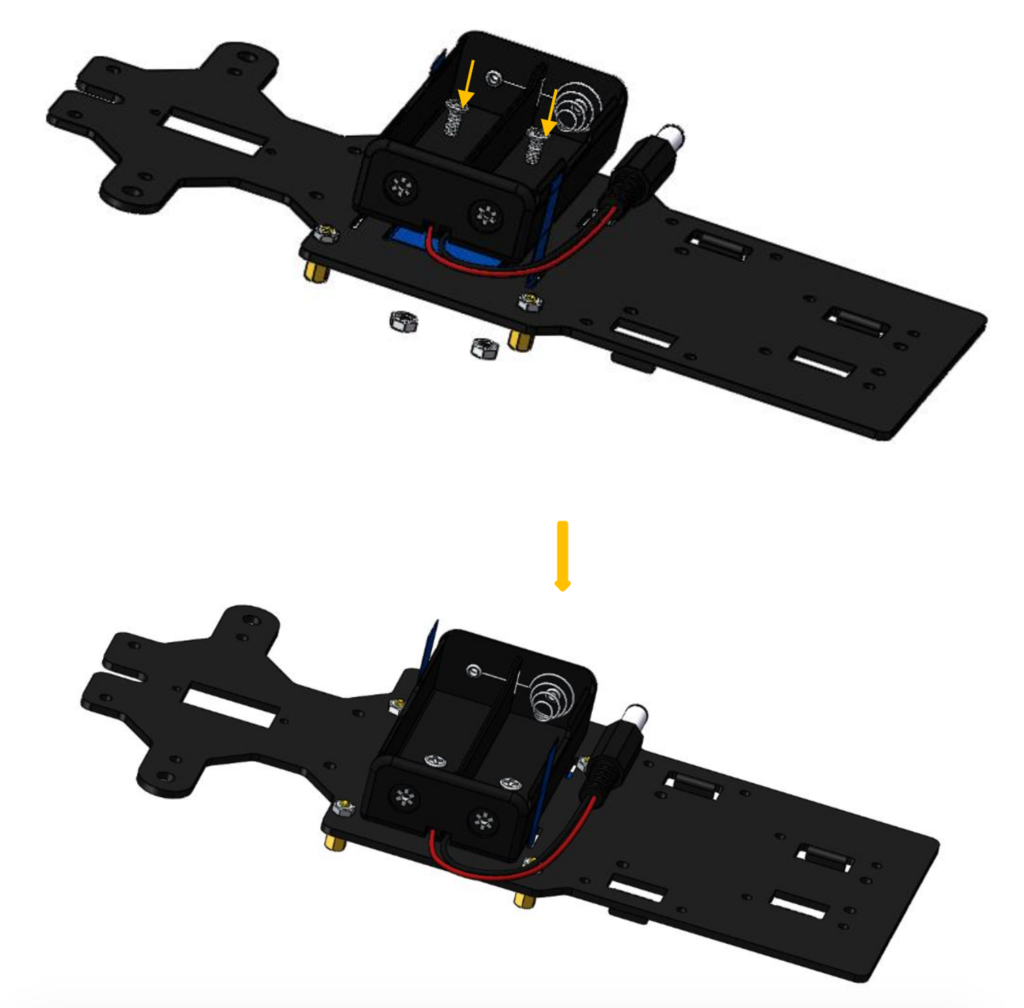
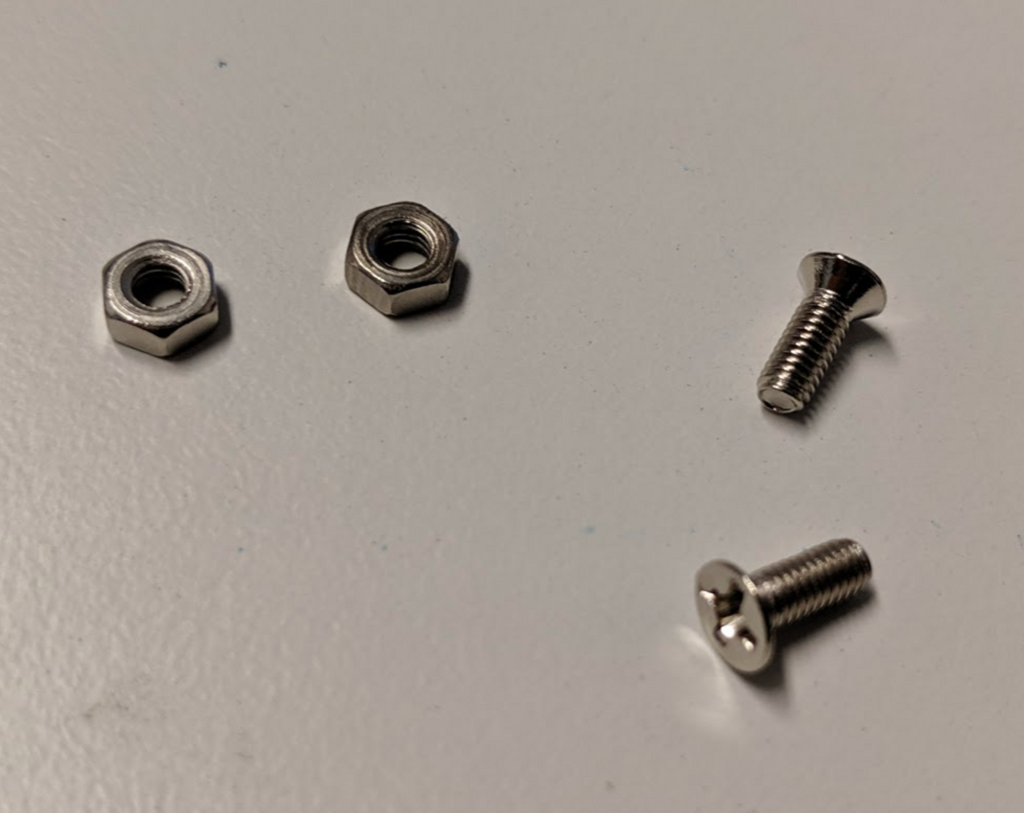
To screw in your battery pack, use the two M3x8 countersunk screws and the two M3 nuts. Countersunk screws have a slanted head and are flat on the top. If you don’t use countersunk screws for this then the batteries won’t be able to fit in the holder.
Pay attention to the location of the wire sticking out of the battery pack and make sure it lines up with the diagram above.
Note: If you have the non-tabbed version of the plate, your completed upper chassis should look like this:
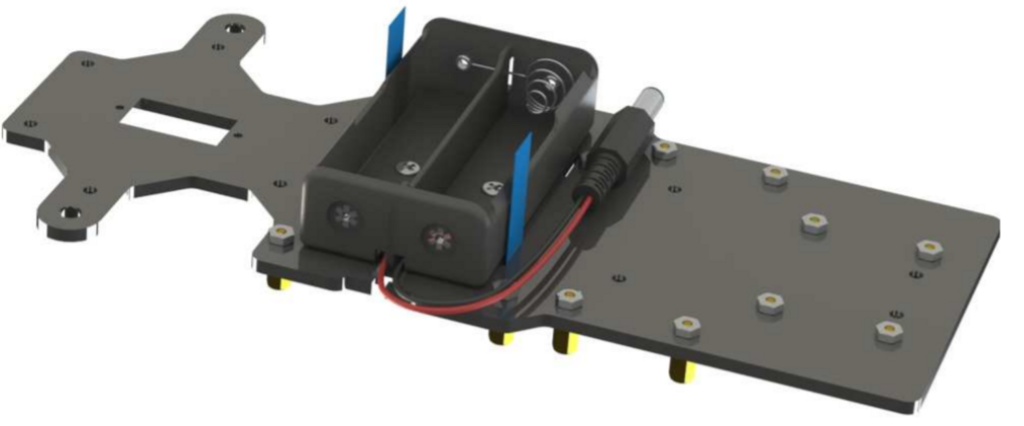
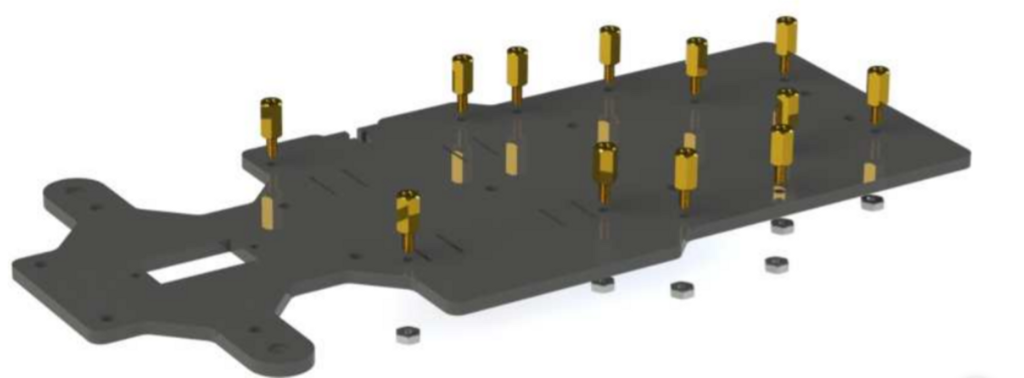
Finally, insert four M3x8 screws with four M3x25 copper standoffs into the screw holes shown. This is where we will attach the rear wheels we assembled at the start of the Quest.
Upper chassis plate complete!