🔋 Step 1: Battery Holder Assembly
Let’s start building this thing! Take it one step at a time and if you get stuck, give yourself a break, ask for help, or check back in with these guides.
The first step is to create the Battery Holder Assembly. You will need the parts shown below to complete this step.
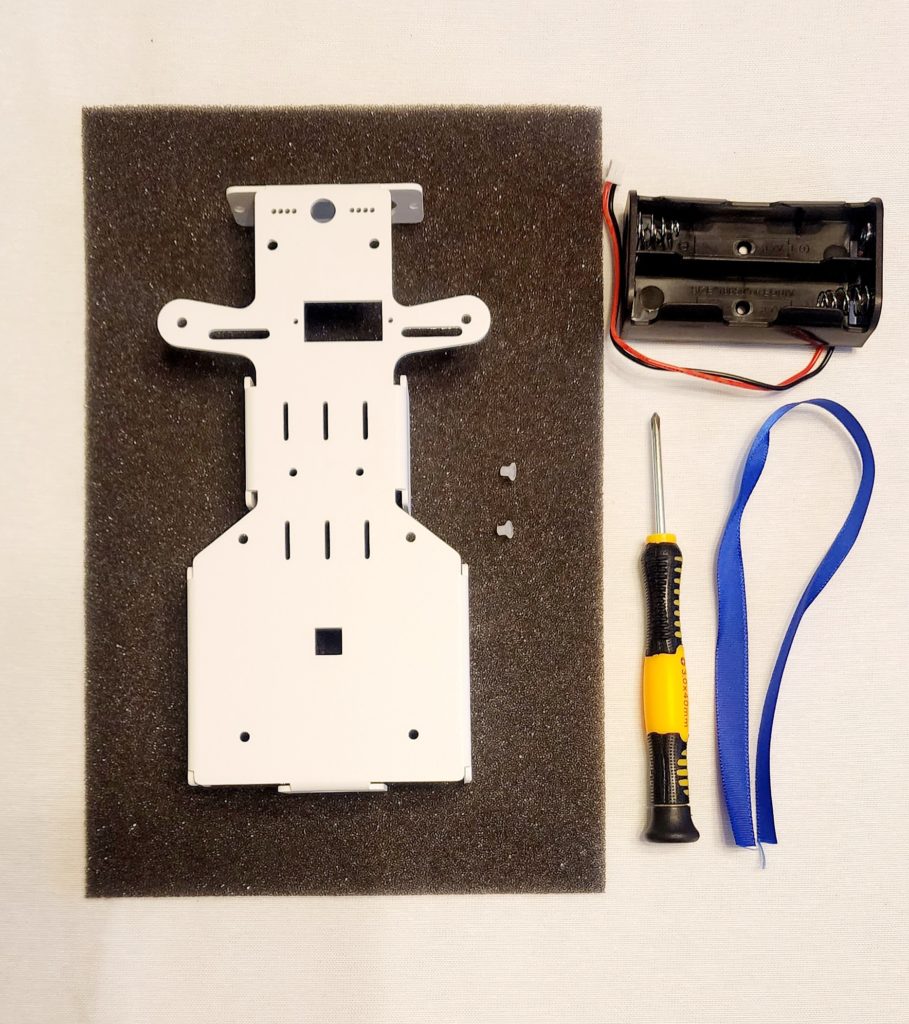
Assembling the Battery Holder!
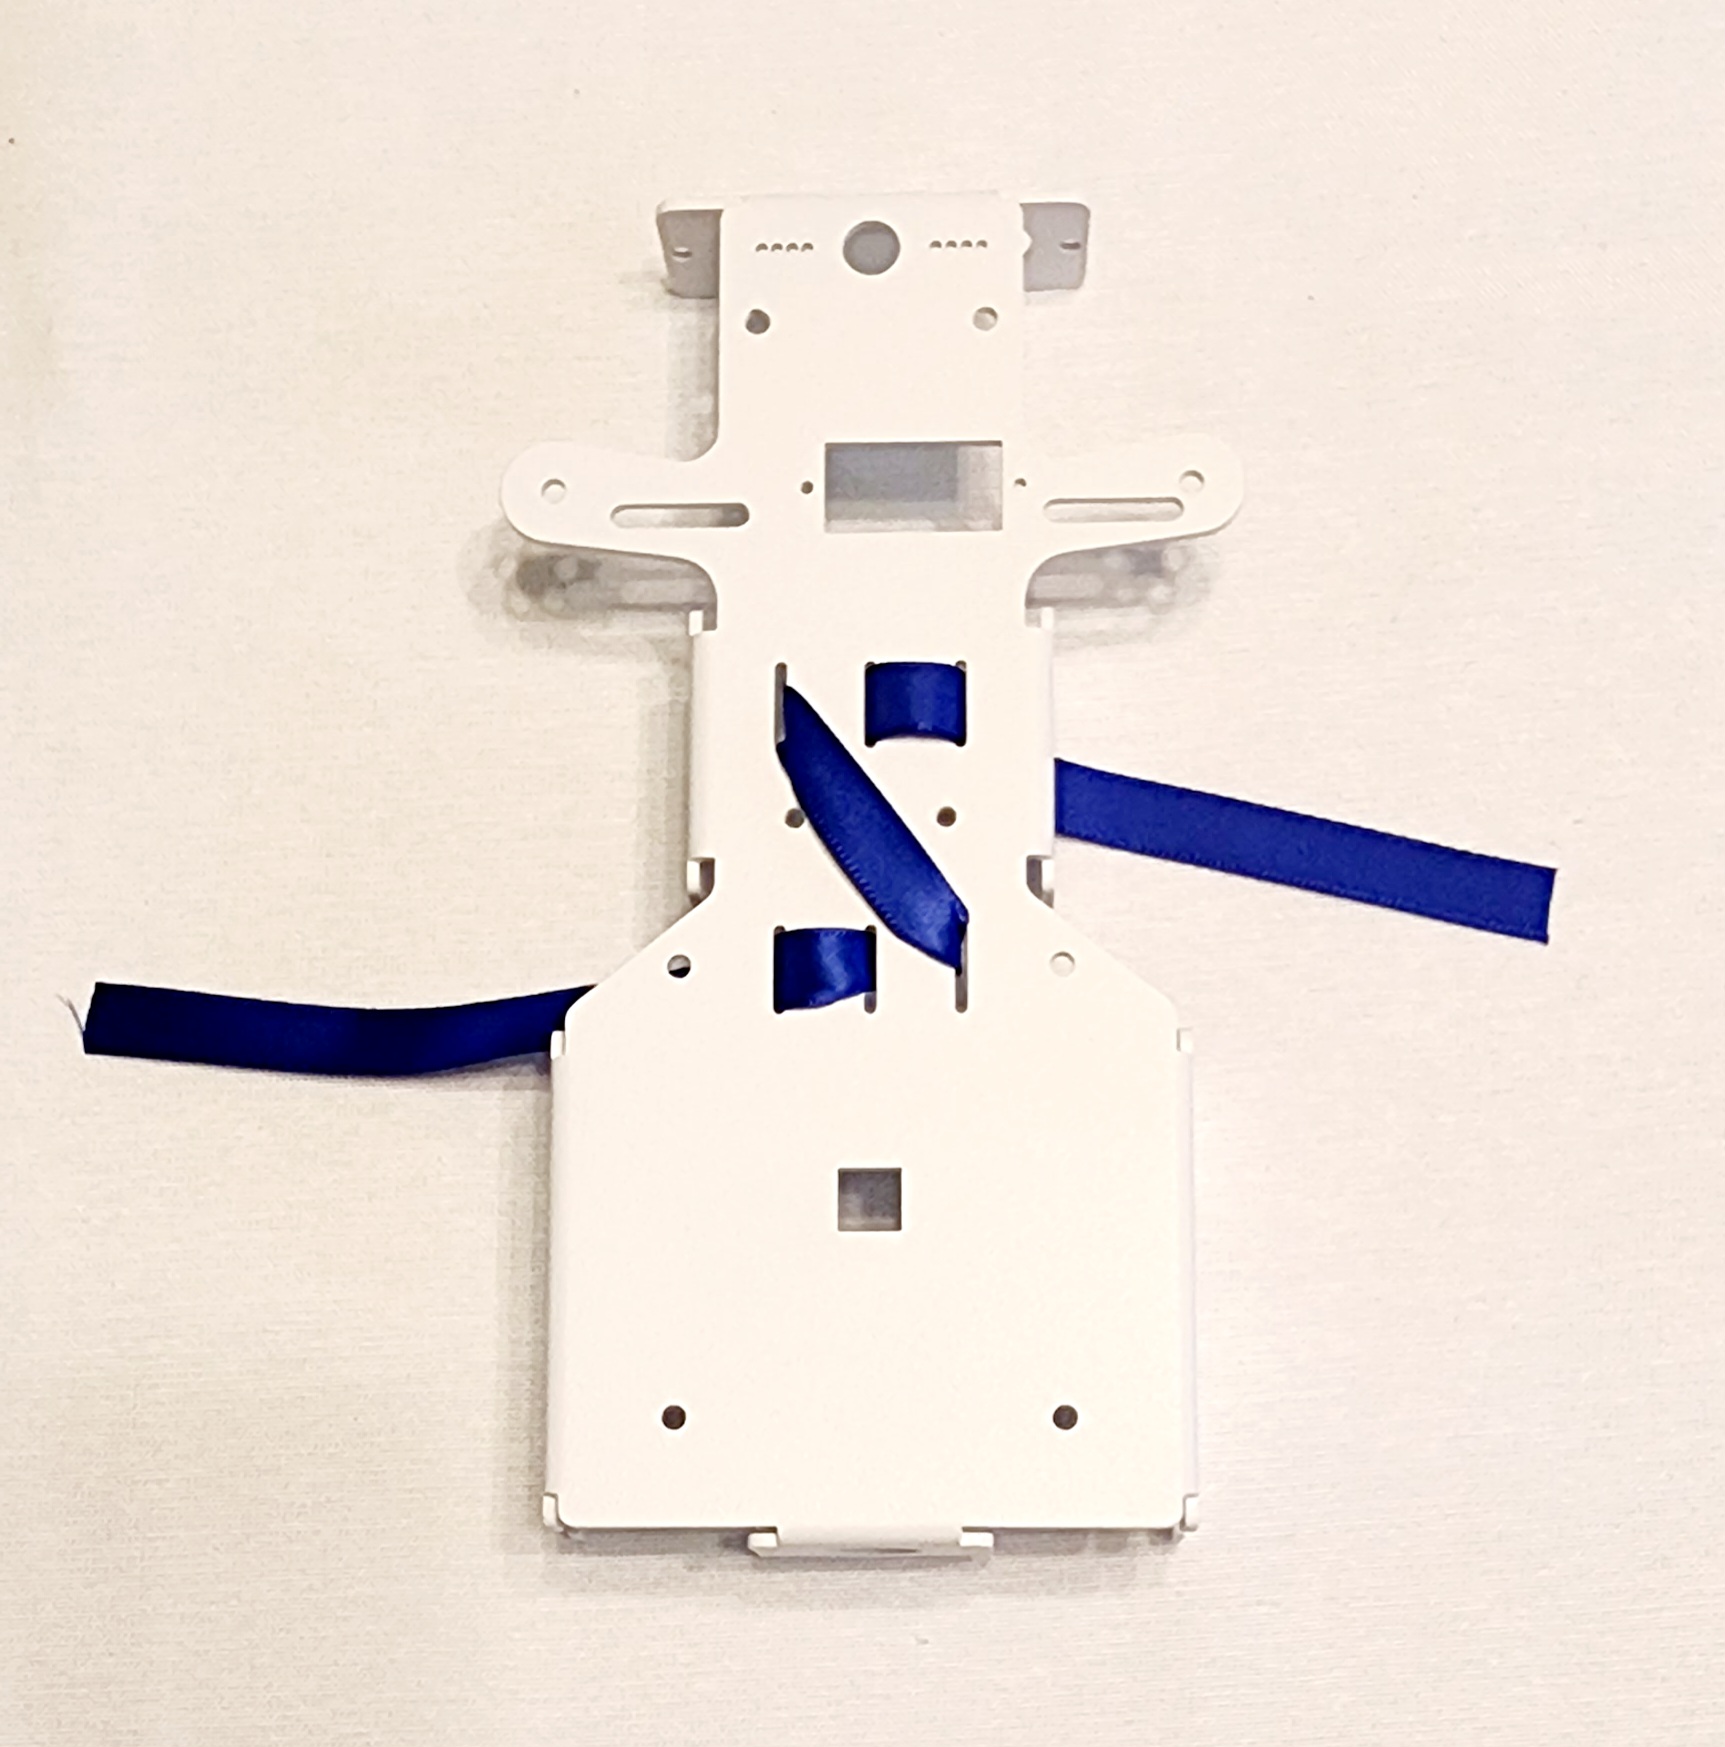
Insert the ribbon into the structural plate as shown below.
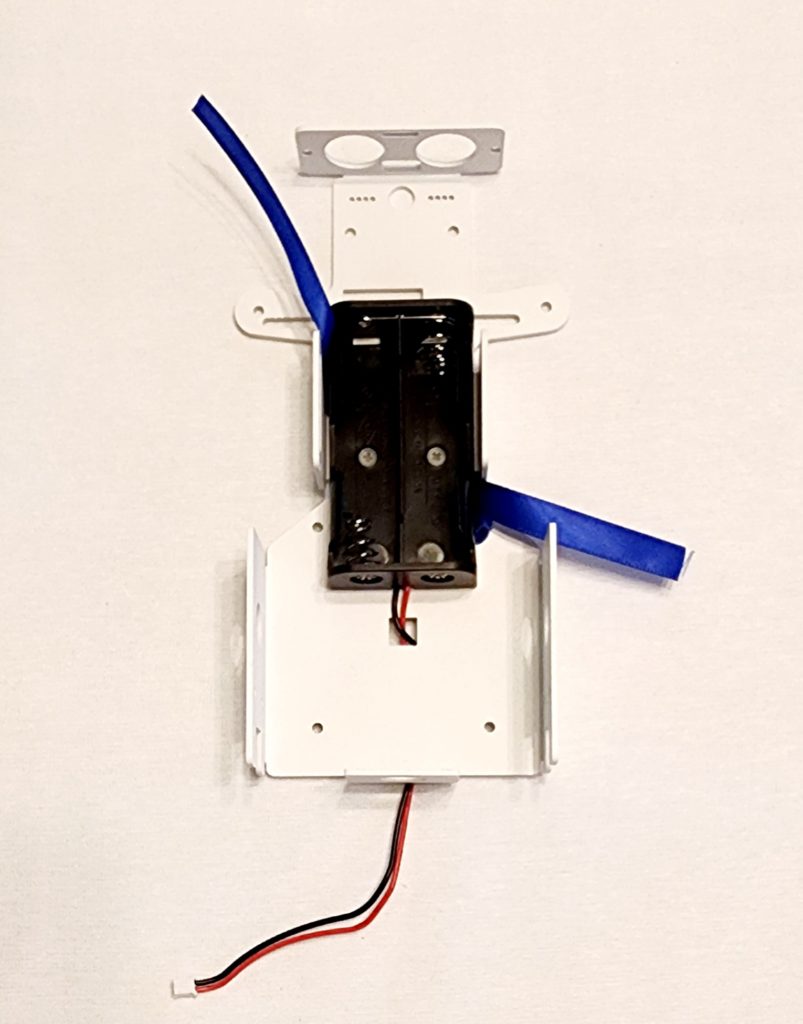
To screw in your battery pack, use the two M3x4 countersunk screws. Countersunk screws have a slanted head and are flat on the top. If you don’t use countersunk screws for this then the batteries won’t be able to fit in the holder.
Pay attention to the location of the wire sticking out of the battery pack and make sure it lines up with the picture below.
When inserting the batteries, make sure to pull the ribbon underneath each battery. This step makes it much easier to remove the batteries when needed.
Pass the battery holder wire through the hole as shown below.